Table of Contents
Nothing screams “amateur hour” quite like wavy, paint-splattered edges where your walls meet the ceiling. You’ve invested hours in perfect color selection, painstakingly taped off baseboards, and carefully rolled your walls—only to pull back the tape and reveal a jagged mess that draws the eye like a neon sign. That heart-sinking moment is exactly why professional painters and serious DIYers alike have shifted their focus from endless rolls of blue tape to precision-engineered paint edgers. These clever tools promise crisp, contractor-quality lines without the time-consuming prep work, but navigating the sea of options can feel overwhelming.
The truth is, not all paint edgers are created equal, and the difference between a flawless finish and a frustrating do-over often comes down to understanding which features matter most for your specific project. Whether you’re tackling a single accent wall or an entire home renovation, the right edger transforms one of painting’s most dreaded tasks into a satisfying, almost meditative process. This comprehensive guide cuts through the marketing hype to arm you with the knowledge to choose wisely, use skillfully, and maintain your tool for years of picture-perfect results.
Top 10 Paint Edgers For Clean Edges
Detailed Product Reviews
1. Paltren 12-Inch Paint Edger & Trim Guard | Stainless Steel Straight Edge Tool | Painters Tape Alternative | Creates Crisp, Clean Pro-Grade Lines on Walls & Ceilings
 Straight Edge Tool | Painters Tape Alternative | Creates Crisp, Clean Pro-Grade Lines on Walls & Ceilings](https://m.media-amazon.com/images/I/316YBq8BP+L._SL160_.jpg)
Overview: The Paltren 12-Inch Paint Edger positions itself as a professional-grade substitute for painter’s tape, featuring a rigid stainless steel blade that promises crisp lines without the tedious prep work. Designed for cutting in along ceilings, trim, and baseboards, this tool targets serious DIYers and professionals who value speed and precision on smooth surfaces.
What Makes It Stand Out: Its 12-inch stainless steel blade is the star feature—substantially longer than most competitors, allowing you to cover more area with fewer passes. The rigid construction resists flexing, which is critical for maintaining straight lines and preventing bleed-through. Combined with an ergonomic ABS handle, it offers superior control and reduces hand fatigue during extended painting sessions.
Value for Money: Priced competitively against premium edgers, the Paltren justifies its cost through durability alone. The stainless steel blade resists rust and corrosion, while the ABS handle withstands job site abuse. When you factor in the money saved on painter’s tape and the hours reclaimed in prep time, it pays for itself within a single room renovation.
Strengths and Weaknesses: Strengths include exceptional line precision on smooth surfaces, robust construction, easy cleanup, and dramatic time savings. The 12-inch width dramatically speeds up cutting-in. Weaknesses: it’s explicitly not recommended for textured surfaces, and beginners may face a learning curve to master the technique. It also lacks guide wheels, requiring a steady hand.
Bottom Line: For those with smooth walls seeking professional results without tape, the Paltren edger is an excellent investment. While it demands some skill, the time savings and crisp lines make it worthwhile for serious painting projects.
2. Paint Edger Roller Brush, Multifunctional Hand-held Clean-Cut Paint Edger Roller Brush Portable Tool Kit, Rexroth Pole Mountable with Roller and Brush for Home Room Wall Ceiling Painting

Overview: This multifunctional paint edger offers a budget-friendly approach to clean edges, combining a roller and brush in a handheld plastic housing. Marketed as a portable solution for DIYers, it aims to simplify cutting-in around doors, windows, and ceilings without the premium price tag of professional tools.
What Makes It Stand Out: The tool’s modular design allows you to remove both the roller and small brush for cleaning or replacement, extending its lifespan. A built-in shield promises to protect trim and ceilings from splatters, while its compatibility with extension poles (though not explicitly detailed) suggests versatility for hard-to-reach areas.
Value for Money: This is clearly an entry-level option. The plastic construction keeps costs low, making it accessible for occasional painters. However, durability concerns mean frequent users might need replacements. For a single project or infrequent use, it delivers acceptable value, but professionals should invest in sturdier alternatives.
Strengths and Weaknesses: Strengths: affordable price, lightweight design, interchangeable components, and decent splatter protection. Weaknesses: plastic construction feels flimsy, lacks precision features like guide wheels, and the generic brand raises quality control questions. The roller may not provide the smoothest finish compared to pad-style edgers.
Bottom Line: Suitable for budget-conscious DIYers tackling small rooms, this edger gets the job done but don’t expect miracles. For crisp, professional lines or frequent use, upgrade to a metal-edged or wheeled model.
3. Paint Edger Pro - 2024 New Painting Trimmer Edger Tools for Walls High Ceilings with Edger Paint Brush Kit, Bucket Edge Paint Roller Splatter Shield for Trim Corner Painting Cut in Tool (Handheld)
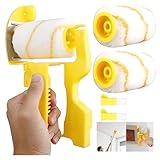
Overview: The Paint Edger Pro markets itself as a 2024 innovation promising to paint 10-20 times faster than a traditional sash brush. This kit includes two rollers and two brushes, with a design focused on high ceilings and tight corners, featuring guide wheels and a rotatable handle for enhanced maneuverability.
What Makes It Stand Out: Guide wheels and a 180° rotatable handle are key differentiators, allowing smooth navigation along edges and corners. The ability to attach to any telescopic extension pole makes it genuinely practical for high ceilings. The inclusion of replacement rollers and brushes adds value, ensuring you’re equipped for larger projects without immediate extra purchases.
Value for Money: Mid-range pricing with bonus accessories makes this a solid value proposition. The wheeled design reduces errors and paint waste, potentially saving money on touch-ups. While marketing claims of “10-20x faster” are exaggerated, it does accelerate cutting-in compared to manual brushwork, justifying the cost for multi-room projects.
Strengths and Weaknesses: Strengths: wheeled guidance system, pole-mountable for high ceilings, rotatable handle for ergonomics, and included spare components. Weaknesses: overhyped marketing language, unclear build quality from the description, and potential durability concerns with moving parts. The emoji-heavy marketing may deter professional users.
Bottom Line: A versatile, user-friendly option for multi-story homes or rooms with high ceilings. The wheeled design helps DIYers achieve cleaner lines, though durability remains a question mark. Worth considering for its ceiling-focused features.
4. Upgrade Paint Edger Tool for Walls - Clean Cut Edge Painting Tool - Sturdy Paint Trimmer Edger with Reinforced Roller - Corner Wall & Ceiling Painter - User-Friendly Paint Pad Edger

Overview: This “Upgrade” paint edger emphasizes professional results with a reinforced roller design that aims to prevent splatter while delivering clean edges. Explicitly positioned as user-friendly, it targets DIYers who want quality without complexity, though notably warns it’s unsuitable for high ceilings, limiting its versatility.
What Makes It Stand Out: The reinforced roller is the headline feature, designed to minimize splatter better than standard rollers. Its corner-focused design addresses a common pain point, while the ergonomic construction promises fuss-free application. The manufacturer offers 24-hour after-sales support and a satisfaction guarantee, indicating confidence in the product.
Value for Money: Priced in the mid-range, it offers good value for interior rooms with standard ceiling heights. The satisfaction guarantee reduces purchase risk. However, the high ceiling limitation narrows its applicability, making it less versatile than pole-mountable competitors that offer greater reach for tall spaces.
Strengths and Weaknesses: Strengths: splatter-reducing reinforced roller, corner-specific design, ergonomic comfort, and strong customer support. Weaknesses: cannot be used on high ceilings, lacks guide wheels for precision, and the “upgrade” claim is vague without clear comparison. May struggle with textured surfaces like orange peel or knockdown finishes.
Bottom Line: Ideal for single-story homes or standard ceiling heights, this edger excels at corner painting with minimal mess. The support guarantee makes it a safe choice, but if you have high ceilings, look elsewhere.
5. Shur-Line 2006559 Edger Plus Premium Paint Edger Depth -1.875", Width - 5.75", Height-6.5" Red and Black 1 each

Overview: The Shur-Line Edger Plus is a premium, compact paint edger from a trusted brand in painting tools. Measuring just 5.75 inches wide, it features guide wheels and a pivoting/swiveling mechanism designed for precise control along trim, ceilings, and corners. This is a tool built on decades of painting innovation and reliability.
What Makes It Stand Out: Shur-Line’s reputation for quality is this tool’s foundation. The dual guide wheels ensure consistent spacing from edges, while the pivoting head adapts to your hand movements, reducing fatigue and improving accuracy. Its compact size excels in tight spaces where larger edgers prove cumbersome. The threaded pole mount adds versatility for ceiling work.
Value for Money: As a premium option, it’s priced higher than generic alternatives but justifies the cost through proven durability and precision. The brand’s reliability means fewer replacements, making it economical for frequent users. For occasional painters, the price may be harder to justify over budget options that cost half as much.
Strengths and Weaknesses: Strengths: trusted brand quality, guide wheels for precision, pivoting head for control, pole-mountable, and excellent for detailed work. Weaknesses: narrow 5.75-inch width means more passes on large areas, premium pricing, and the small size may feel insufficient for broad wall sections. No mention of included accessories like spare pads.
Bottom Line: A reliable, precision-engineered tool for those who prioritize quality over speed. Perfect for detail-oriented projects and trim work. If you’re a serious DIYer or professional, the Shur-Line Edger Plus is worth the investment despite the higher price.
6. Qyueyue Painter’s Trim Guard 12 Inch Paint Shield, Edge Painting Tool for Walls, Professional Paint Edger Tool for Precise Trimming(Yellow)

Overview: The Qyueyue 12-inch Paint Shield is a straightforward, no-nonsense tool designed to protect adjacent surfaces while painting edges. This simple plastic barrier serves as a physical guard against paint bleeding, offering a manual alternative to taping and advanced edger systems.
What Makes It Stand Out: Its generous 12-inch length covers substantial areas quickly, while the bright yellow color ensures you’ll never lose it in a cluttered workspace. Unlike complex edgers with wheels or pads, this tool’s simplicity is its strength—no moving parts to break, no pads to replace, and no learning curve. The flexible yet sturdy plastic conforms slightly to surfaces, creating a tight seal.
Value for Money: Priced at the lower end of the market, this shield pays for itself after just one room by eliminating costly painter’s tape and hours of application time. The durable, easy-to-clean plastic construction means it will last through countless projects, offering exceptional ROI for DIYers and professionals alike.
Strengths and Weaknesses: Strengths include its lightweight design that reduces hand fatigue, versatile size for both broad strokes and detailed work, and effortless cleanup. The smooth surface prevents paint buildup, maintaining clean lines project after project. Weaknesses are the lack of a dedicated handle or grip, requiring careful hand positioning, and the need for a steady hand to maintain consistent contact. It also lacks the advanced features of wheeled edgers, making it less suitable for those seeking automated guidance.
Bottom Line: For painters who value simplicity and reliability over gadgetry, the Qyueyue Paint Shield delivers professional results with minimal investment. It’s an essential backup tool that belongs in every painter’s kit.
7. Emery Edger Edging Tool for Edges and Trim | Paintbrush Not Included - Attaches to 2 Inch Brushes - Patented Design
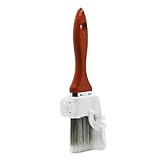
Overview: The Emery Edger revolutionizes edge painting by attaching directly to a standard 2-inch flat sash brush, transforming it into a precision trimming instrument. This award-winning tool eliminates the need for tape through its innovative shield system.
What Makes It Stand Out: The patented Two-Shield Reservoir Design creates a dual-barrier system that captures excess paint and prevents it from bleeding onto trim. Unlike pad-based edgers that only access 30% of trim work, this tool handles 100%—from thin molding to textured ceilings. The design eliminates wheels and pads entirely, removing common failure points.
Value for Money: Positioned in the mid-range, the Emery Edger offers professional-grade results without premium pricing. By eliminating tape costs and reducing touch-up time, it quickly justifies its price. The durable construction ensures years of reliable service, making it more economical than disposable pad systems.
Strengths and Weaknesses: Key strengths include its versatility across various trim types, drip-free operation, and the ability to use your preferred brush. It produces crisp lines without the messy wheel marks common to other edgers. The main weakness is the requirement for a flat sash brush (not angled), which may necessitate purchasing a specific brush. There’s also a learning curve to master the technique, and the brush is not included.
Bottom Line: The Emery Edger is a game-changer for serious DIYers and professionals seeking tape-free perfection. Its innovative design solves fundamental problems that plague traditional edgers, making it a worthwhile investment for frequent painters.
8. Bates Trim Brush, 0.75 Inch Edge Painting Tool, Trimmer Edger

Overview: The Bates 0.75-inch Trim Brush takes a traditional approach to edge painting, offering a small, precision paintbrush designed specifically for detailed trim work. This compact tool prioritizes control and finesse over automated systems.
What Makes It Stand Out: Despite its modest size, this brush features thick synthetic filaments that hold substantial paint, reducing reload frequency. The quality plastic handle provides exceptional comfort during extended use, while the angled sash design allows for superior control when cutting in edges. It’s a professional-quality tool at an entry-level price point.
Value for Money: Extremely budget-friendly, this brush delivers remarkable durability and performance for its price. Unlike single-use foam brushes, the Bates Trim Brush cleans easily and maintains its shape through multiple projects, offering unbeatable value. It’s an affordable way to achieve professional results without investing in complex systems.
Strengths and Weaknesses: Strengths include precise control for detailed work, comfortable ergonomic handle, excellent paint-holding capacity, and suitability for all skill levels. The synthetic bristles resist shedding and provide a smooth finish. Weaknesses stem from its manual nature—achieving perfect lines requires practice and a steady hand. It’s slower than wheeled edgers for large areas and offers no protection against paint bleeding beyond the painter’s skill.
Bottom Line: For those who prefer the reliability and control of a quality brush, the Bates Trim Brush is an outstanding choice. It’s perfect for small projects, touch-ups, and detail work where precision matters more than speed.
9. Paint Edger Pro - 2024 New Painting Trimmer Edger Tools for Walls High Ceilings with Edger Paint Brush Kit, Bucket Edge Paint Roller Splatter Shield for Trim Corner Painting Cut in Tool (Expandable)

Overview: The Paint Edger Pro is a comprehensive painting system designed for tackling edges and corners, particularly in hard-to-reach areas like high ceilings. This expandable kit includes multiple components to address various painting challenges.
What Makes It Stand Out: The tool’s compatibility with any telescopic extension pole immediately sets it apart, eliminating ladder work for high areas. The guide wheels and 180° rotatable handle provide exceptional maneuverability, while the combination of roller and brush allows for both speed and precision. The included splatter shield adds an extra layer of protection.
Value for Money: While priced higher than basic shields, this kit includes multiple accessories—two rollers, two brushes, and the main edger body. The time savings claim of painting 10-20 times faster than a sash brush, if accurate, provides tremendous value for large projects. It replaces several separate tools in one package.
Strengths and Weaknesses: Major strengths include the extension pole compatibility for safety and reach, corner-painting capability, and the dual roller/brush approach for versatility. The guide wheels help maintain consistent lines. Weaknesses include potential complexity in assembly and cleaning multiple components. The roller may create texture inconsistencies compared to brush-only edging, and the durability of the rotating mechanism could be a concern with heavy use.
Bottom Line: Ideal for homeowners with high ceilings or large painting projects, the Paint Edger Pro offers a versatile, time-saving solution. It’s best suited for those willing to trade some simplicity for enhanced capability and reach.
10. Paint Edge Trimmer + 2 Replace Pads - Adjustable 35.4-78.7 Inch Spliceable Pole, Ceiling & Corner Painting | Includes Replaceable Paint Pads | Professional Paint Edger for Clean, Sharp Lines

Overview: The IAOVAW Paint Edge Trimmer positions itself as a professional-grade solution for edge painting, featuring an adjustable pole system and replaceable pads. This tool combines the precision of a pad edger with the reach of an extension system.
What Makes It Stand Out: The standout feature is the 360° adjustable rotating handle, offering unprecedented flexibility for awkward angles and corners. The included spliceable pole extends from 35.4 to 78.7 inches, providing excellent reach without purchasing separate equipment. Dense 5mm bristles ensure superior paint absorption and smooth application.
Value for Money: This premium-priced tool justifies its cost through professional build quality and included accessories. The replaceable pad system extends the tool’s lifespan, while the integrated pole eliminates the need for a separate purchase. For professionals, the durability and versatility offer strong ROI.
Strengths and Weaknesses: Strengths include the robust construction, flexible handle positioning, excellent reach, and professional finish quality. The guide wheel structure stays secure during use. Weaknesses include the higher initial investment and ongoing cost of replacement pads. The complexity may overwhelm casual DIYers, and the glossy finish could become slippery when wet.
Bottom Line: A top-tier choice for professionals and serious DIY enthusiasts who demand versatility and durability. The adjustable pole and rotating handle make it exceptionally capable for challenging spaces, though its price may exceed the needs of occasional painters.
Why Clean Edges Make or Break Your Paint Job
The human eye is naturally drawn to boundaries and transitions. When someone enters a freshly painted room, their gaze instinctively travels to the edges where colors meet. A crisp, laser-straight line communicates intentionality and craftsmanship, while a sloppy edge subconsciously undermines the entire effort, no matter how flawless the wall coverage. This psychological principle explains why professional painters spend disproportionate time on edges—they understand that these details define the perceived quality of their work.
The Psychology of Perceived Quality
Research in visual perception shows that our brains process clean lines as indicators of professionalism and care. When edges are sharp and consistent, the entire space feels more polished. Conversely, uneven paint lines create visual noise that makes a room feel chaotic and unfinished. This isn’t just about aesthetics; it’s about the emotional response your space generates. A well-executed edge suggests attention to detail that extends beyond the paint itself, influencing how people perceive the overall maintenance and value of your home.
Common Edge Painting Challenges
Edge painting presents unique obstacles that differ from broad wall application. The proximity to adjacent surfaces—whether ceilings, trim, or accent walls—leaves zero margin for error. Paint tends to accumulate at the tool’s edges, creating thick beads that seep under barriers. Uneven pressure causes skip marks and thin coverage. Drying times become critical when working in tight quarters where overlapping strokes are unavoidable. Understanding these challenges is the first step toward selecting an edger engineered to overcome them.
Understanding Different Paint Edger Types
The market offers several distinct categories of paint edgers, each with specific strengths and ideal applications. Recognizing these fundamental differences prevents the common mistake of choosing a tool suited for a different task entirely.
Pad-Style Edgers
These rectangular tools feature a flat, absorbent pad that hugs surfaces to create a barrier while depositing paint. The simplicity of their design makes them approachable for beginners, but their effectiveness hinges entirely on pad quality and user technique. They excel at creating straight lines along ceilings and baseboards but require a steady hand and proper loading technique to prevent paint from bleeding past the guard.
Wheel-Guided Edgers
Precision-engineered wheels roll along adjacent surfaces, maintaining a consistent gap while the paint pad applies color to the target wall. This mechanical guidance system eliminates the tremor and inconsistency of freehand work. The wheel material—whether plastic, rubber, or silicone—impacts performance on different surfaces. These tools shine in large rooms where fatigue would compromise manual control, though they demand careful cleaning to prevent wheel-track marks.
Corner and Detail Edgers
Designed for the most challenging intersections, these specialized tools navigate the tight geometry where two walls meet a ceiling or where trim creates complex profiles. Their compact size sacrifices speed for accuracy, making them essential for finishing work but inefficient for long runs. The best versions feature adjustable angles to accommodate imperfect corner construction, which is far more common than most homeowners realize.
Multi-Tool Systems
Modular systems allow users to swap heads for different tasks—edging, cutting in, and even narrow rolling. While they offer excellent value and reduce toolbox clutter, their jack-of-all-trades nature means individual components may not match the performance of dedicated tools. These systems appeal to DIYers who paint occasionally and prioritize storage efficiency over specialized excellence.
Key Features That Separate Quality Edgers From Frustrating Ones
Manufacturers pack their marketing with buzzwords, but certain engineering details genuinely impact performance. Learning to identify these features saves money and prevents mid-project tool failures.
Pad Material and Absorbency
The pad’s composition determines everything from paint release to edge sharpness. High-density foam pads provide excellent control for latex paints but struggle with thicker oil-based formulas. Microfiber pads hold more paint and release it more evenly, reducing reload frequency. The critical factor is the pad’s ability to maintain its shape under pressure—compressed fibers create rounded edges that defeat the purpose of precision work. Look for pads with reinforced backing that resist deformation during use.
Guide Wheels and Precision Engineering
On wheeled edgers, the wheel assembly’s quality dictates long-term accuracy. Wheels should spin freely without wobble, and their mounting must maintain perfect perpendicular alignment to the pad. Cheap tools often use plastic bushings that wear quickly, creating slop in the mechanism. Better designs incorporate sealed bearings or bronze sleeves that maintain tolerance through hundreds of hours of use. The wheel’s diameter also matters—larger wheels bridge surface imperfections better but reduce maneuverability in tight spaces.
Handle Design and Ergonomics
Edge painting requires repetitive, controlled movements that strain hands and wrists. An ergonomic handle with a non-slip grip reduces fatigue and maintains steady pressure. The handle’s angle relative to the pad affects visibility and control; offset designs let you see the edge you’re cutting without contorting your wrist. Some premium tools feature rotating handles that adapt to different cutting directions, a game-changer for large projects.
Refill and Replacement Availability
A quality edger should last years, but pads wear out and wheels eventually fail. Before purchasing, verify that replacement components are readily available and reasonably priced. Some manufacturers design tools with proprietary pad shapes that become unavailable when models are discontinued, rendering the entire tool useless. Standardized pad sizes and widely stocked refills indicate a manufacturer’s commitment to long-term support.
How to Match Edger Type to Your Specific Project
The “best” edger depends entirely on your project’s parameters. A tool perfect for a single-bedroom refresh might fail miserably on a multi-room renovation with varying surface conditions.
Room Size and Scale Considerations
For extensive edge work spanning thousands of linear feet, prioritize speed and fatigue reduction. Wheeled edgers with large paint capacity minimize reloads and maintain consistent results even when your arm grows tired. In contrast, a single accent wall project might benefit from a simple pad edger where setup time and cost matter more than efficiency. Consider ceiling height too—tools with extension pole compatibility save ladder work and reduce safety risks.
Paint Type Compatibility
Thick, high-viscosity paints like elastomeric or textured coatings require edgers with deep pad fibers that can hold and release heavy material without dragging. Standard edgers work beautifully with typical latex wall paints but struggle with enamels or epoxies used in kitchens and bathrooms. For oil-based paints, ensure the tool’s materials resist solvent degradation; cheap plastic handles can become sticky and weak when exposed to mineral spirits.
Surface Texture Challenges
Heavily textured walls, such as orange peel or knockdown finishes, create gaps that paint can seep through. Some edgers feature flexible, conforming pads that press into texture valleys, while others include adjustable wheels that maintain contact despite surface irregularities. Smooth surfaces demand different considerations—wheels can leave tracks on glossy finishes, making pad-style tools preferable for cutting in around trim on semigloss doors or cabinets.
Professional Techniques for Flawless Edge Application
Even the finest tool performs poorly in untrained hands. Master these techniques to unlock your edger’s full potential and achieve results that rival professional work.
The Two-Load Method
Professional painters rarely try to cut a perfect edge in one pass. Instead, they use a two-step approach: first, load the edger generously and make a light pass to establish the line, intentionally staying slightly away from the absolute edge. This initial coat seals the surface and provides a guide. After a brief drying period, they reload and make a second, precisely placed pass that creates the final crisp line. This method compensates for surface imperfections and prevents the heavy paint buildup that causes bleeding.
Working in Proper Sections
Edge painting requires working in manageable sections—typically three to four feet at a time. This prevents the paint from skinning over before you can feather the edge. Work from dry areas into wet paint, maintaining a “wet edge” to avoid lap marks. In hot or dry conditions, reduce section length to maintain proper blending. Always complete an entire wall in one session; stopping mid-wall creates visible break lines that no amount of touching up can completely erase.
Feathering and Blending
The final two inches of each section require special attention. Rather than lifting the edger abruptly, gradually reduce pressure and feather the paint edge to create an invisible transition to the next section. Some pros keep a small brush handy for “back-brushing” the final inch, using the edger for the heavy lifting and the brush for ultimate precision. This hybrid approach combines speed with perfection.
Common Mistakes That Cause Edger Failure
Understanding what not to do is often more valuable than knowing proper technique. These frequent errors turn promising tools into sources of frustration.
Overloading the Pad
The most common rookie mistake is treating an edger like a miniature roller, loading it with excessive paint. Overloaded pads deposit thick ridges that seep under guards and create uneven coverage. Instead, aim for a medium load that covers the pad without saturating it completely. The paint should transfer to the wall with light pressure; if you’re pressing hard to make it flow, you’ve overloaded. Wipe excess paint from the guard edges after each load to prevent drips.
Incorrect Angle and Pressure
Edgers work best when held at a consistent, shallow angle—typically 15 to 20 degrees from the wall. Too steep and the guard lifts away from the adjacent surface, creating gaps. Too shallow and the pad doesn’t make full contact, leaving skip marks. Pressure should be firm but not aggressive; let the tool’s weight do the work. Consistent technique across the entire project matters more than perfect technique in isolated spots.
Skipping Surface Preparation
Even the best edger cannot compensate for dusty, greasy, or uneven surfaces. Paint adheres poorly to contaminants, leading to peeling and bleed-through. Wipe down all edges with a damp cloth and allow them to dry completely. For glossy surfaces, a light scuffing with fine-grit sandpaper improves mechanical adhesion. Fill nail holes and caulk gaps before painting; trying to edge over imperfections forces the tool to bridge voids, guaranteeing inconsistent results.
Maintenance and Care for Longevity
A quality edger represents an investment that pays dividends across multiple projects. Proper maintenance ensures consistent performance and extends tool life dramatically.
Cleaning Protocols for Different Paint Types
Latex paint cleans easily with warm water and mild detergent if addressed promptly. Rinse pads thoroughly until water runs clear, then gently squeeze (never wring) excess moisture and allow air drying. For oil-based paints, use the appropriate solvent—mineral spirits for alkyds, denatured alcohol for shellacs. Soak pads briefly, agitate gently, and change solvent if it becomes saturated. Always clean wheels separately, removing paint buildup that can cause tracking. Never allow paint to dry on any component; cured paint is nearly impossible to remove without damaging the tool.
Storage Best Practices
Store edgers with pads removed or fully dried to prevent mildew and fiber compression. Hang tools rather than stacking them; weight on the pad creates permanent deformations. Keep tools in a climate-controlled environment—extreme heat can warp plastic components, while freezing temperatures can crack seals and handles. For long-term storage between projects, lightly coat metal parts with a rust-preventative oil, especially in humid climates.
When to Replace Components
Pads lose effectiveness when fibers become matted or the edge rounds over. Replace them at the first sign of poor paint release or edge definition. Wheels need replacement when they develop flat spots, wobble, or fail to spin freely. Continuing with worn components forces you to compensate with technique, introducing inconsistency. Keep spare pads on hand; attempting to stretch a worn pad through the final wall of a project often results in the most visible mistakes.
Cost vs. Value: Investing Wisely
Price doesn’t always correlate with performance, but certain price points reliably indicate quality levels. Understanding the value proposition helps you spend appropriately for your needs.
Budget-Friendly Options
Sub-$10 edgers can produce acceptable results for small, infrequent projects. These tools typically use simpler materials and may lack replacement part availability. They’re ideal for renters or homeowners painting a single room. The trade-off is durability; expect to replace the entire tool rather than refurbish it. Look for solid construction even at low prices—avoid flimsy plastic handles that flex under pressure, as this makes consistent results impossible.
Professional-Grade Investments
Tools in the $25-$50 range feature better engineering, replaceable components, and ergonomic designs that reduce fatigue during extended use. For homeowners planning multiple projects or tackling whole-house painting, this investment pays for itself in time savings and reduced frustration. Professional-grade tools also maintain value; they can be resold or passed down, unlike disposable budget options. The key is ensuring the tool matches your skill level; a complex professional system offers no advantage if you paint one wall per year.
Hidden Costs to Consider
Factor in the cost of replacement pads, which can add $5-$10 per project. Some proprietary systems require expensive, hard-to-find refills that negate initial savings. Consider your time value; a $30 tool that saves two hours of touch-ups and repainting represents excellent value. Also account for accessory costs—extension poles, specialty cleaning brushes, and storage cases add up. A tool that includes these extras often provides better overall value than a cheaper bare-bones option.
Safety and Environmental Considerations
Edge painting introduces unique safety concerns beyond typical painting hazards. Addressing these proactively protects your health and minimizes environmental impact.
VOC Exposure and Ventilation
Cutting in edges often brings your face close to the wall, increasing inhalation of volatile organic compounds. This proximity effect means standard room ventilation may be insufficient. Use a fan to create active airflow across your work area, positioning it to draw fumes away from your breathing zone. For oil-based products, consider a respirator with organic vapor cartridges rather than a simple dust mask. Take frequent breaks in fresh air, especially when working in small, enclosed rooms.
Chemical Cleanup Responsibilities
Paint waste, even water-based, carries environmental responsibilities. Never pour rinse water down storm drains; it contaminates waterways. For latex cleanup, allow wash water to sit in a sealed container until paint solids settle, then pour off clear water and dispose of sludge as solid waste. Solvent-based cleanup requires more care; reuse mineral spirits by allowing paint to settle, then decant clean liquid. Dispose of spent solvent at hazardous waste collection events. These steps take minutes but prevent lasting environmental damage.
Ergonomic Injury Prevention
The repetitive, precise motions of edge painting strain wrists and shoulders. Use tools with cushioned, non-slip grips to reduce vibration and pressure points. Alternate hands when possible to distribute the workload. Take micro-breaks every 20 minutes to stretch fingers and rotate wrists. For ceiling work, use extension poles to avoid overhead reaching, which compresses neck vertebrae and strains rotator cuffs. A five-minute stretching routine before starting can prevent weeks of lingering tendonitis.
DIY vs. Professional-Grade Edgers
The tool aisle blurs the line between consumer and professional equipment, but meaningful differences exist that should guide your selection.
What Hobbyists Actually Need
Occasional painters need reliability and ease of use more than advanced features. Simple pad edgers with clear instructions and minimal setup serve them best. Complexity introduces failure points that frustrate infrequent users. Look for tools that work well out of the box without extensive technique development. For most homeowners, a mid-range pad edger and a quality angled sash brush for touch-ups provide the best balance of cost, capability, and learning curve.
When to Upgrade Your Tool Kit
Consider upgrading when you notice consistent limitations with your current tool. If you’re taping extensively because you don’t trust your edger, it’s time for better equipment. Upgrading makes sense when project scale increases—painting an entire house justifies professional tools that would be overkill for a bathroom refresh. Also upgrade when using premium paints; high-quality coatings demand precise application to justify their cost, and inferior tools waste that investment through poor performance.
Material Compatibility Matrix
Paint formulation significantly impacts edger performance. Matching tool characteristics to paint properties prevents compatibility issues that ruin finishes.
Latex Paints
Most edgers handle standard latex wall paints beautifully. The water-based formula releases cleanly from pads and cleans up easily. However, low-VOC and zero-VOC formulations can be thicker and stickier, requiring pads with deeper fiber penetration to prevent dragging. High-build latex primers demand robust pad construction that won’t collapse under the heavier material. For these paints, microfiber pads outperform foam by maintaining consistent paint distribution.
Oil-Based Paints
Oil-based enamels and alkyds flow differently than latex, leveling to a smoother finish but requiring careful application to avoid sags. Edgers for these paints need solvent-resistant components; cheap foam pads can dissolve or swell. The slower drying time of oils actually benefits edging, allowing more working time to perfect lines. However, cleanup requires mineral spirits, and pads must be thoroughly rinsed to prevent hardening. Consider dedicating a specific edger to oil-based work to avoid cross-contamination.
Specialty Finishes
Textured paints, metallics, and chalk-style coatings present unique challenges. Textured paints contain aggregates that can clog edger pads; choose tools with easily replaceable, inexpensive pads. Metallic paints show every application mark; edgers must release paint ultra-smoothly, making high-quality microfiber essential. Chalk paints are thick and fast-drying, requiring stiff pads that can spread them without absorbing excessively. Always test your edger with the actual paint on a sample board before committing to walls.
Troubleshooting Common Edger Problems
Even experienced painters encounter issues. Knowing how to diagnose and correct problems mid-project saves time and prevents complete do-overs.
Bleeding and Seepage
When paint seeps under the guard onto adjacent surfaces, several factors could be responsible. Overloading is the primary culprit—reduce the paint load and wipe guard edges. Check that the guard sits flush; accumulated dried paint on the guard face creates gaps. For wheeled edgers, ensure wheels are clean and spin freely; stuck wheels drag and lift the guard. If bleeding persists, the surface may be too porous; apply a thin coat of primer or sealer along the edge first to create a barrier.
Uneven Coverage
Skip marks and thin spots indicate inconsistent pressure or an improperly loaded pad. Practice maintaining steady, moderate pressure throughout the stroke. If the pad feels dry partway through, you didn’t load enough paint initially. For pad edgers, ensure the entire pad face contacts the wall; tilting lifts one edge. With wheeled edgers, check that wheels are aligned at the same height; uneven wheels rock the pad, causing intermittent contact. Sometimes simply rotating the pad 180 degrees between loads distributes wear more evenly.
Wheel Marks and Tracking
Wheeled edgers can leave faint tracks on delicate surfaces, especially glossy paints. Clean wheels obsessively, removing even microscopic paint buildup. Reduce wheel pressure by holding the tool at a slightly shallower angle. For critical finishes, run the edger over a painted surface first to “season” the wheels with a micro-thin layer of paint, reducing friction. If tracks persist, switch to a pad-style edger for the final coat, using the wheeled tool only for the initial cut-in.
Advanced Tips for Complex Edge Scenarios
Standard techniques falter when confronted with architectural details and challenging surfaces. These advanced strategies handle the exceptions that basic instructions ignore.
Textured Ceilings
The “popcorn” or knockdown ceiling texture that was standard for decades creates a jagged, uneven edge that’s nearly impossible to follow with standard tools. The solution is a two-tool approach: first, use a stiff brush to carefully paint the texture tips along the edge, creating a buffer zone. Then run your edger along the wall, positioned slightly below the texture line. The initial brushwork prevents the edger from picking up texture particles while ensuring complete coverage. For heavy textures, consider using an edger with an adjustable guard that can ride over the high points.
Decorative Molding
Crown molding, chair rails, and intricate trim demand precision that standard edgers can’t provide. Use a small detail edger with a narrow pad that fits within the molding profile. Work in short sections, using the molding itself as a guide. For deep profiles, consider using a small artist’s brush for the absolute edge, then filling in with the edger slightly behind it. This hybrid approach yields sharp detail without the time cost of hand-painting everything. Always paint molding first, then walls, allowing you to be less precise where the wall meets the molding.
Tight Spaces and Obstacles
Radiators, pipes, and tight corners obstruct standard edger movement. In these spots, remove the edger pad and hold it with your fingers like a stamp, dabbing paint precisely where needed. For recurring obstacles, consider cutting a custom pad shape from a replacement pad to fit the specific gap. Another trick is to attach a small piece of cardboard to the edger guard as a temporary extension, allowing you to reach behind obstacles while maintaining a clean line. Creativity in tool adaptation often solves problems that no off-the-shelf tool can address.
Frequently Asked Questions
How do I know when it’s time to replace my edger pad instead of just cleaning it?
Replace pads when fibers become permanently matted, the edge loses its crisp square shape, or paint no longer releases evenly despite thorough cleaning. If you notice you’re pressing harder to get coverage or the pad leaves streaks even when properly loaded, it’s worn out. For most users, a pad lasts 2-3 medium-sized rooms before needing replacement.
Can I use the same edger for walls and ceilings, or do I need separate tools?
You can use the same edger for both, but ceiling work accelerates wear due to gravity pulling paint toward the pad’s lower edge. If you do extensive ceiling painting, consider a dedicated ceiling edger with a reinforced guard to prevent sagging. For occasional ceiling work, simply clean your standard edger thoroughly after use and inspect the pad for uneven wear.
Why does my edger leave a ridge of paint along the edge of the guard?
This ridge forms when excess paint accumulates on the guard face and transfers to the wall. Wipe the guard edges with a damp cloth after each load. Also, reduce your paint load slightly—overloading is the primary cause. If the ridge persists, check that the guard sits perfectly flat against the pad; any gap allows paint to seep underneath and build up.
Are wheeled edgers really better than pad-only styles?
Neither is inherently superior; they serve different purposes. Wheeled edgers excel at long, straight runs like ceiling lines, providing mechanical consistency that reduces fatigue. Pad-only styles offer better control in tight spaces and on uneven surfaces. Many experienced painters own both, using wheeled tools for main edges and pad styles for detail work.
How do I prevent paint from drying on the wheels and causing tracks?
Clean wheels immediately after use with appropriate solvent or water. For extended painting sessions, keep a damp rag handy and wipe wheels every 15-20 minutes. Some painters apply a light coat of furniture wax to wheels before starting, which prevents paint adhesion. Never use lubricants that could contaminate the paint film.
What’s the best way to edge around textured walls without getting paint on the texture?
Use a pad-style edger with a firm, thin pad that can press into texture valleys. Load lightly and work in short strokes, checking frequently for seepage. Alternatively, use a brush to carefully cut the edge first, creating a barrier, then edge slightly behind that line. For heavy texture, consider using a shield or guard held in your other hand as a movable barrier.
Can I use paint edgers with primer, or will that ruin the pad?
You can and should use edgers with primer. The key is thorough cleaning afterward, as primer formulas can be harder to remove once cured. Clean immediately after use while primer is still wet. Some painters keep a dedicated “primer pad” that’s older or less pristine, saving their best pads for finish coats. This extends the life of your premium pads.
How do I edge where two different paint colors meet in a straight line?
Paint the lighter color first, extending slightly past where the line will be. Once dry, use your edger to apply the darker color, using the edge of the lighter paint as your guide. The darker color provides better coverage and hides any minor imperfections. Use a fresh, lightly loaded pad to prevent bleeding onto the already-painted surface.
Is it worth buying an expensive edger if I only paint once every few years?
Probably not. For infrequent use, a mid-range tool ($15-$25) with available refills offers the best value. Expensive professional tools justify their cost through durability and efficiency gains that only frequent use realizes. However, avoid the cheapest options, as their poor performance will frustrate you and may lead to costly repainting. A reliable mid-tier tool stored properly will serve occasional needs perfectly.
What’s the trick to edging along carpet without getting paint on the fibers?
Press the carpet down firmly with a putty knife or dedicated carpet shield, creating a gap between the carpet and baseboard. Edge with a pad-style tool held at a steep angle, using the putty knife as your guard. Work in very short sections, moving the shield frequently. Some painters apply painter’s tape to the carpet edge first, but this is time-consuming. The key is keeping paint loads minimal to prevent drips that wick into carpet fibers.
See Also
- 10 Paint Brushes and Rollers That Solve Messy Edges in 2026
- 10 Best Paint Brushes for Corners and Edges in 2026
- 10 Best Value Paint Edgers for Crown Molding in 2026
- 10 Game-Changing Paint Edgers for Perfect Lines in 2026
- How to Choose the 10 Best Paint Edgers for Baseboards in 2026