Table of Contents
Nothing derails a DIY project faster than the sickening crunch of a drill bit hitting empty drywall—or worse, severing a live electrical wire. For decades, homeowners relied on the knock-and-guess method, tapping walls and hoping for the best. Today, battery-powered stud finders have transformed wall scanning from a gamble into a precise science. These pocket-sized tools eliminate the frustration of multiple holes, protect your home’s infrastructure, and give you the confidence to hang heavy mirrors, mount TVs, or install shelving without second-guessing.
But not all stud finders are created equal. The market is flooded with options sporting everything from basic LED lights to full-color displays that map your entire wall. Understanding what separates a reliable tool from a disappointing toy is crucial before you invest. This guide cuts through the marketing noise, giving you the technical knowledge to choose the perfect battery-powered stud finder for your specific needs—whether you’re a weekend warrior or a seasoned contractor.
Top 10 Battery-Powered Stud Finders
Detailed Product Reviews
1. DEWALT Stud Finder, 3/4”, Locate Framing Studs Efficiently with LED Arrows, Ideal for Wood and Metal, AAA Batteries Included (DW0100)
, 3/4", Locate Framing Studs Efficiently with LED Arrows, Ideal for Wood and Metal, AAA Batteries Included (DW0100)](https://m.media-amazon.com/images/I/41GL8dYVLcL._SL160_.jpg)
Overview: The DEWALT DW0100 brings professional-grade electronic stud detection to the DIY market. This 3/4-inch depth scanner uses center-find technology to pinpoint stud centers while automatically calibrating for consistent accuracy. Designed for wood and metal framing, it includes crucial AC wire detection to prevent dangerous drilling accidents.
What Makes It Stand Out: The LED arrow system provides intuitive directional guidance, eliminating guesswork when locating edges and centers. The constant auto-calibration feature saves valuable time compared to manual calibration models, while the integrated center marking channel lets you pencil-mark accurately without removing the tool. The slim profile fits comfortably in tool belts and tight spaces.
Value for Money: Priced in the mid-range for electronic finders, the DW0100 justifies its cost through DEWALT’s reliability and safety features. The included AAA batteries and durable construction offer immediate value. While basic magnetic finders cost less, the AC detection alone makes this worthwhile for safety-conscious users.
Strengths and Weaknesses: Pros include accurate center-finding technology, live wire detection, hassle-free auto-calibration, clear LED indicators, and trusted brand warranty. Cons are battery dependency, limited 3/4-inch depth that struggles with plaster, and occasional false positives on textured walls. It requires a learning curve for optimal technique.
Bottom Line: The DEWALT DW0100 excels for drywall projects where safety and precision matter. It’s ideal for homeowners and contractors who need reliable electronic detection without premium pricing. Skip it for thick plaster walls, but for standard drywall applications, it’s a dependable workhorse that prevents costly mistakes.
2. The Original StudBuddy® Magnetic Stud Finder - Made in The USA - Easy to Use Magnet Stud Finder - No Batteries Required - Powerful Magnets - Stud Finder for Drywall and Wood

Overview: The StudBuddy strips stud finding to its essence: a powerful neodymium magnet that locates fasteners behind drywall. This American-made tool eliminates electronics entirely, offering foolproof operation without batteries, calibration, or complex settings. It works by physically “sticking” to screw heads in studs.
What Makes It Stand Out: Its absolute simplicity is its genius—there are no moving parts to break and no batteries to die mid-project. The Made in USA quality ensures durable construction that lasts years. Unlike electronic alternatives, it never requires recalibration and works instantly out of the package. The strong magnet provides tactile feedback you can feel.
Value for Money: At a budget price point, the StudBuddy delivers exceptional lifetime value. It’s a one-time purchase that pays for itself after a single use compared to rental costs. While limited in scope, it perfectly serves its intended purpose without ongoing costs or replacements.
Strengths and Weaknesses: Strengths include unlimited battery life, zero maintenance, rugged durability, immediate readiness, and proven reliability on standard drywall. Weaknesses are its drywall-only limitation, lack of depth indication, no wire detection, and potential user error on uneven surfaces. It won’t help with plaster or tile applications.
Bottom Line: The StudBuddy is perfect for occasional DIYers who need a simple, reliable tool for hanging pictures or mounting TVs on drywall. It won’t replace electronic finders for complex projects, but its unbeatable simplicity and reliability make it an essential backup tool that belongs in every homeowner’s drawer.
3. StudPoP® Original Smart Magnetic Stud Finder – No Batteries, No Calibration, 3X More Reliable, Perfect for Lath & Plaster, Metal Studs – Visual & Audible Indicator, Simple & Fun to Use – 1" Magnet

Overview: The StudPoP revolutionizes magnetic stud finding with its patented visual and audible pop indicator. Unlike traditional magnetic finders that rely solely on tactile feedback, this tool signals detection with a satisfying click and visible magnet movement. It’s specifically engineered for challenging wall types where other finders fail completely.
What Makes It Stand Out: The 1-inch moving magnet provides both auditory and visual confirmation, eliminating the uncertainty of “feeling” the attraction. Its enhanced sensitivity works reliably on lath and plaster, tile, and metal studs—surfaces that defeat conventional magnetic and most electronic finders. No batteries or calibration means it’s always ready to use.
Value for Money: While pricier than basic magnetic finders, the StudPoP justifies its cost by succeeding where others fail. For owners of older homes with plaster walls, it prevents costly damage from failed detection attempts. The frustration it saves makes it a worthwhile investment for these specific applications.
Strengths and Weaknesses: Pros include visual/audible feedback, plaster and tile compatibility, no power requirements, superior sensitivity, and fun operation. Cons are higher price, smaller scanning area requiring more passes, and the pop mechanism may wear over time. It’s less effective on extremely thick plaster than advertised.
Bottom Line: The StudPoP is absolutely indispensable for historic homes with plaster walls. If you’ve struggled with electronic finders failing and weak magnets providing no feedback, this tool solves that problem effectively. For standard drywall, it’s overkill, but for challenging surfaces, it’s the most reliable non-electronic option available today.
4. Powerful Magnetic Stud Finder PRO (Upgraded Version) Reinforced with 3 Neodymium Magnets - No-Battery Stud Detector - Deep Detection of Wood & Metal Studs in Drywall (Not for Plaster Walls) | 1 Pack

Overview: This upgraded magnetic finder triples down on power with three neodymium magnets for enhanced detection depth. The transparent design with built-in marking arrows offers a modern take on traditional magnetic finders, allowing visual confirmation of fastener location while scanning larger wall sections efficiently.
What Makes It Stand Out: Three magnets create a stronger, wider detection field that grabs fasteners more decisively than single-magnet designs. The clear plastic body lets you see exactly where to drill, while integrated arrows guide precise marking. Its larger size covers more surface area per pass, speeding up scanning considerably.
Value for Money: Positioned competitively against premium magnetic finders, the triple-magnet design offers measurable improvement in detection strength without a significant price jump. For frequent users, the time saved in faster scanning and more confident detection provides solid ROI compared to weaker alternatives.
Strengths and Weaknesses: Strengths include superior magnetic pull, transparent sighting window, built-in alignment arrows, larger scanning area, and scratch-free design. Weaknesses are its explicit unsuitability for thick plaster, bulkier size for tight spaces, and lack of wire detection. The three magnets may occasionally attract to multiple fasteners simultaneously.
Bottom Line: This PRO version excels for drywall-heavy projects where speed matters. Contractors and serious DIYers will appreciate the stronger detection and visual confirmation. However, if you work with plaster or need wire detection, look elsewhere. For pure drywall performance, it’s among the best magnetic options available.
5. 52300 Studball, 27 Pounds of Pull Power Magnetic Stud Finder, No Batteries Stud Finder Wall Scanner Detect Metal Through 5/8" Drywall, Wood or 3/4" Plywood Paneling, Ceramic Tiling etc.

Overview: The Studball takes a radically different approach with a spherical design housing an incredibly powerful 27-pound pull magnet. This unique shape and extreme magnetic force allow it to detect fasteners through thicker materials than conventional finders, while doubling as a metal retrieval tool and magnetic hook.
What Makes It Stand Out: The spherical form factor rolls smoothly across walls and ceilings, naturally conforming to contours. Its massive magnetic strength detects through 5/8-inch drywall, 3/4-inch plywood, and ceramic tile—capabilities that exceed most magnetic competitors. The integrated rubber ring allows tethering for retrieving dropped metal objects from tight spaces.
Value for Money: While moderately priced, the Studball’s versatility extends beyond stud finding to utility retrieval and tool hanging. For professionals who frequently drop fasteners in hard-to-reach areas, this dual functionality provides excellent value. Casual users may find the power excessive for simple tasks.
Strengths and Weaknesses: Pros include exceptional magnetic strength, multi-surface capability, unique retrieval function, durability, and speed. Cons are the awkward shape for precise marking, overkill for standard drywall, no visual indicator, and potential to scratch if debris gets trapped. It’s less intuitive than flat scanners.
Bottom Line: The Studball suits contractors and power users needing maximum detection depth and utility. Its retrieval feature alone justifies the purchase for renovation professionals. For typical homeowners hanging pictures, it’s unnecessarily powerful. But if you battle thick paneling or need a multi-purpose magnetic tool, it’s uniquely capable.
6. Calculated Industries 7310 StudMark Magnetic Stud Finder with 2 Removable Magnet Markers | Finds & Marks up to 3 Stud Locations | Updated 2020 More Powerful Rare Earth Magnets, No Batteries Needed
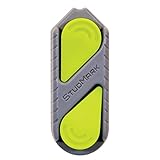
Overview:
The Calculated Industries 7310 StudMark revolutionizes magnetic stud finding with its innovative marker system. This professional-grade tool locates metal fasteners behind drywall using powerful rare earth magnets, then lets you mark up to three stud positions simultaneously without reaching for a pencil. Updated in 2020 with stronger magnets, it adheres firmly to walls for hands-free operation, making it ideal for contractors and serious DIYers who value efficiency. The compact design fits in any tool belt or pocket, ensuring it’s always within reach when you need to hang heavy items or start a renovation project.
What Makes It Stand Out:
Unlike any competitor, the StudMark includes two removable magnetic markers that attach to your wall, allowing you to map multiple stud locations before drilling. The 2020 upgrade features more powerful rare earth magnets that provide true hands-free operation once a fastener is detected. This eliminates the tedious back-and-forth of traditional stud finders and removes the guesswork from vertical alignment. The system works by detecting screws or nails in studs through standard drywall, though it’s not recommended for thicker plaster walls.
Value for Money:
Priced in the mid-range for magnetic stud finders, the StudMark justifies its cost through unique functionality. While basic magnetic finders cost less, none offer the multi-position marking capability that saves significant time on larger projects. The two-year warranty and battery-free operation mean zero ongoing costs, making it more economical than electronic alternatives that require periodic replacement batteries and calibration.
Strengths and Weaknesses:
Pros: Innovative dual-marker system for mapping multiple studs; powerful rare earth magnets enable hands-free use; no batteries or calibration needed; compact pocket-sized design; two-year warranty. Cons: Not suitable for plaster or lath walls; limited effectiveness on thicker drywall; markers could be lost if not stored properly; higher price than basic magnetic models.
Bottom Line:
The StudMark is an excellent investment for anyone regularly working with drywall installations. Its unique marking system and strong magnetic hold make it superior to basic magnetic finders, though users with plaster walls should look elsewhere. For drywall projects, it’s a time-saving tool that quickly pays for itself.
7. 2 PCS Stud Finder, Magnetic Stud Finder Easy to Use, No Batteries Required, Rapid to Locate Screws, Nails, Metal Studs Through Drywall and Wood - Powerful Magnet Stud Finder

Overview:
This budget-friendly two-pack delivers straightforward magnetic stud detection without complexity. Each unit uses high-quality neodymium magnets to locate screws and nails hidden behind drywall, providing reliable results for basic home improvement tasks. The absence of batteries and moving parts ensures consistent performance without maintenance concerns. Designed for installers who prioritize speed and simplicity, these finders work by physically attracting to metal fasteners, giving you a precise location marker that stays put while you prepare your drill or mounting hardware.
What Makes It Stand Out:
The value proposition of receiving two functional stud finders at an entry-level price point makes this set particularly attractive for homeowners or professionals wanting backups. The super-strong neodymium magnets offer reliable detection through standard drywall and wood framing. Its foolproof operation requires no learning curve—simply glide the device along the wall until it sticks. The tool’s versatility spans new construction and older homes alike, though it’s explicitly not intended for lath and plaster walls.
Value for Money:
Exceptional value defines this two-pack offering. Comparable single magnetic stud finders often cost nearly as much as this pair, effectively giving you a spare tool for complex projects or multiple tool bags. With no battery costs and durable construction, the lifetime ownership expense is minimal. While lacking advanced features of premium models, the core functionality remains identical, making this an intelligent choice for cost-conscious buyers.
Strengths and Weaknesses:
Pros: Excellent value with two units included; no batteries or calibration required; simple, reliable operation; strong neodymium magnets; works on various drywall constructions. Cons: Basic design without ergonomic features; no hands-free marking capability; not effective on plaster walls; magnets may be weaker than premium 27-pound models.
Bottom Line:
This two-pack offers unbeatable value for occasional DIYers or as backup tools for professionals. While it lacks the refinement of higher-end magnetic finders, its simplicity and reliability make it perfect for standard drywall projects. Keep one in your toolbox and another in your kitchen drawer for quick household tasks.
8. (2-Pack) Calvana Magnetic Stud Finder - 27 lbs of Pull Power Stud Ball, Detects Nails, Screws, and Metal, Through 5/8" Drywall, Wood or 3/4" Plywood Paneling, No Batteries Required, 52300

Overview:
The Calvana stud ball represents the high-performance end of magnetic stud detection, boasting an impressive 27 pounds of magnetic pull power. This two-pack features spherical rare earth magnets with triple-layer NI+CU+NI coating, delivering 6800 Gauss of force to detect fasteners through materials up to 5/8-inch drywall, ceramic tile, and 3/4-inch plywood paneling. The innovative ball design allows for smooth gliding across surfaces while maintaining exceptional sensitivity. Without requiring batteries or calibration, these tools offer professional-grade reliability for demanding applications where weaker magnets might fail.
What Makes It Stand Out:
The sheer magnetic force sets the Calvana apart, capable of finding over 40 steel studs behind 5/8-inch drywall in under a minute. The spherical design concentrates magnetic force effectively while the premium coating prevents corrosion and wear. Unlike flat magnetic finders, the ball shape naturally centers on fastener heads, providing intuitive positioning. Its versatility across multiple wall coverings—including tile and thick paneling—makes it uniquely capable for bathroom renovations and retrofitting projects where other magnetic finders lose effectiveness.
Value for Money:
While priced higher than basic magnetic finders, the 27-pound pull capacity and multi-material compatibility justify the premium. Electronic stud finders with similar depth capabilities cost significantly more and require batteries. The two-pack configuration provides excellent value for professionals needing multiple tools or homeowners wanting a spare. Considering its durability and zero operating costs, the initial investment delivers long-term savings.
Strengths and Weaknesses:
Pros: Massive 27-pound pull power; works through tile and thick paneling; spherical design centers automatically; triple-layer corrosion-resistant coating; two units included. Cons: Ball shape may roll on uneven surfaces; higher price point; overkill for thin drywall; no built-in marking system.
Bottom Line:
The Calvana is ideal for professionals and serious DIYers tackling diverse wall materials. Its extraordinary magnetic strength and versatility make it worth the premium price, especially for tile or thick paneling projects. For standard drywall only, a less powerful model suffices, but for challenging applications, this is the tool to trust.
9. Stud Finder Wall Scanner, Magnetic Stud Finder With 27 Pounds of Pull Magnetic Power, No Batteries Required Wall Stud Finder Metal Stud Finder for Drywall, Wood, Plywood Paneling, Ceramic Tiling

Overview:
This compact magnetic ball stud finder delivers professional-grade detection power in a pocket-sized package. With 27 pounds of magnetic pull, it locates metal fasteners through 1/2-inch and 5/8-inch drywall, wood framing, ceramic tile up to 3/4-inch thick, and plywood paneling. The spherical rare earth magnet provides 6800 Gauss of force, ensuring reliable detection even in challenging conditions. Its diminutive 2.6 x 0.8-inch size and integrated hanging hole make it exceptionally portable, while the battery-free operation guarantees readiness whenever you need it. The tool adheres directly to walls, serving as its own marker during installation.
What Makes It Stand Out:
The combination of extreme magnetic power and micro-sized portability distinguishes this finder. While most powerful magnets come in larger housings, this model maintains full 27-pound pull in a form factor that disappears into a pocket. The hanging hole allows tethering to a tool lanyard, preventing drops from ladders—a thoughtful touch for professionals. Its ability to detect through multiple wall types including tile makes it versatile for bathroom and kitchen projects where other finders fail. The minimalist design eliminates complexity, appealing to users frustrated with finicky electronic scanners.
Value for Money:
Positioned competitively for a high-power magnetic finder, this single unit offers excellent value for DIYers who need serious capability without buying a two-pack. It matches the performance of premium models at a more accessible price point. The durability and zero maintenance costs enhance long-term value, while the compact size reduces the risk of loss compared to bulkier tools. For homeowners undertaking varied renovation projects, it’s a cost-effective alternative to electronic scanners.
Strengths and Weaknesses:
Pros: Compact and highly portable; powerful 27-pound magnetic pull; works through tile and thick materials; hanging hole for security; no batteries needed. Cons: Single unit (no backup); ball may roll on vertical surfaces; lacks ergonomic grip; no integrated marking system beyond magnetic adhesion.
Bottom Line:
This stud finder excels for users needing maximum power in minimum space. Its versatility across wall types and extreme portability make it perfect for DIYers tackling diverse projects. While professionals might prefer a two-pack, this single unit provides exceptional capability for the price. Just be careful not to lose it in your tool bag.
10. 2-Pack Magnetic Stud Finder - No Batteries Required, Powerful Wall Stud Finder Magnet w/Arrows for Drywall & Wood, Easy-to-Use Stud Detector to Locate Screws, Nails, Metal Studs for Marking&Mounting

Overview:
The HOIGRBOM magnetic stud finder prioritizes user experience with intuitive arrow markings and ergonomic design. This two-pack features powerful magnets encased in a streamlined housing with prominent dual-sided arrows that clearly indicate stud centerlines. The tool requires no batteries, calibration, or setup—simply glide it across drywall until it magnetically adheres to a fastener. The ergonomic grip ensures comfortable extended use while protecting walls from scratches. Designed specifically for drywall and wood stud construction, it provides reliable detection for hanging pictures, mounting TVs, installing shelves, and general remodeling tasks.
What Makes It Stand Out:
The arrow system provides visual guidance that basic magnetic finders lack, helping users quickly identify stud edges and centers. The ergonomic grip distinguishes it from flat, hard-to-handle magnetic plates, offering secure control during scanning. The dual-sided design means arrows are visible regardless of orientation, speeding up workflow. Its compatibility with all drywall constructions makes it versatile for both new homes and older residences, while the two-pack configuration ensures you always have a tool ready in different locations.
Value for Money:
This two-pack offers strong value by combining thoughtful design features with dual-unit convenience. The arrow markings add functionality typically found in more expensive tools, while the ergonomic grip reduces user fatigue during large projects. Priced competitively with other two-pack magnetic finders, the added usability features represent genuine value. No battery costs and durable construction ensure minimal long-term expense, making it economical for homeowners and professionals alike.
Strengths and Weaknesses:
Pros: Helpful arrow markings for precise positioning; ergonomic grip enhances comfort; two units included; strong magnets; no batteries or calibration needed. Cons: Not suitable for lath and plaster walls; arrows may wear off with heavy use; less powerful than 27-pound models; limited to drywall applications.
Bottom Line:
This stud finder is perfect for users who appreciate guidance features without electronic complexity. The arrow system and ergonomic design make it more user-friendly than basic magnetic plates, while the two-pack provides excellent value. For standard drywall projects, it’s an ideal balance of simplicity, functionality, and cost-effectiveness. Professionals and DIYers alike will appreciate the thoughtful design touches.
Why Battery-Powered Stud Finders Are Essential for Modern DIY Projects
The Evolution from Magnetic to Electronic Detection
Remember the old magnetic stud finders that simply located drywall screws? They were better than nothing, but they only found metal fasteners, not the actual wooden stud itself. Battery-powered electronic models changed everything by sensing density changes behind your walls. They detect the stud’s full width, not just where it was nailed, giving you a complete picture of what you’re drilling into. This leap in technology means you can identify stud centers, edges, and even map multiple studs simultaneously for larger mounting projects.
The Cost of Wall Damage vs. Tool Investment
Consider this: a single repair from hitting a water pipe can cost $300-$1,000 in plumbing fees and drywall restoration. Professional electrical repairs after drilling into live wires start at $200 and escalate quickly. A quality battery-powered stud finder typically costs between $30 and $80—a fraction of one potential disaster. When you factor in the time saved from not drilling exploratory holes and the peace of mind knowing your walls are safe, the return on investment becomes obvious within your first project.
Understanding How Stud Finders Work
The Science Behind Electronic Sensors
Battery-powered stud finders use capacitive or radar-based sensors to detect changes in dielectric constant behind drywall. In plain English, they sense when dense material (wood or metal) replaces empty space. The tool emits a small electrical field that penetrates the wall, measuring how quickly signals return. Wood studs slow this signal differently than pipes or wires, allowing sophisticated algorithms to distinguish between materials. The battery powers these sensitive circuits, and voltage stability directly affects accuracy—yet another reason to choose models with reliable power management.
Multi-Sensor Technology Explained
Premium stud finders don’t rely on a single sensor point. They use sensor arrays—multiple detection points working in parallel—to create a more accurate density map. This array scanning reduces false positives from uneven wall textures or isolated debris. When you slide the tool across drywall, these sensors compare readings in real-time, essentially “triangulating” the stud’s position. The more sensors in the array, the better the tool can differentiate between a full stud, a partial obstruction, or a random nail.
Calibration: The Key to Accuracy
Every electronic stud finder must calibrate to your specific wall before scanning. This process typically involves placing the tool flat against the wall and pressing a button. The device reads the baseline density of your drywall, paint, and any existing texture. Skipping this step is like trying to weigh yourself without zeroing a scale first—you’ll get meaningless results. High-quality tools auto-calibrate quickly, while budget models may require manual resetting between scans. Always hold the tool stationary during calibration and ensure full contact with the wall surface.
Key Features That Separate Good Stud Finders from Great Ones
Scanning Depth Capabilities
Standard stud finders penetrate ¾-inch to 1 inch, perfect for drywall. But modern homes feature thicker wall materials like double drywall, plaster, or tile backer board. Deep scan modes can reach 1½ to 3 inches, locating studs through these denser surfaces. However, deeper scanning requires more battery power and can increase false readings from background clutter. The best tools offer multiple depth settings, letting you choose between speed and penetration based on your wall type.
Center-Finding vs. Edge-Finding Technology
Edge-finding models locate stud edges, forcing you to find both sides and calculate the center manually. Center-finding tools use advanced algorithms to identify the stud’s midpoint directly, often displaying it with a clear arrow or mark on the LCD screen. This feature alone can save minutes per stud and eliminates math errors. For professionals mounting heavy items requiring precise lag bolt placement, center-finding isn’t just convenient—it’s essential for safety.
LCD Displays and Visual Indicators
Basic models use a row of LEDs that light up as you approach a stud. While functional, they provide limited information. Modern LCD screens display stud width, depth, and even multiple stud locations simultaneously. Some advanced units graph density changes in real-time, showing you pipes and wires as distinct shapes. Look for backlit displays for dark areas like basements or closets. The screen should be visible from multiple angles and not wash out in bright sunlight.
Audio Alerts and Vibration Feedback
Visual indicators alone aren’t enough when you’re focused on keeping the tool level. Audio beeps that increase in frequency as you approach a stud let you keep your eyes on the tool’s position. Vibration feedback adds another layer, buzzing in your hand when over a target. The best tools allow you to adjust volume or mute sound entirely—crucial for early morning projects when family members are sleeping. Vibration strength should be noticeable but not so aggressive it affects your scanning stability.
Wire Detection and Live AC Warning
This feature borders on non-negotiable. Quality battery-powered stud finders detect live electrical wires up to 2 inches deep, often before they detect the stud. The tool should alert you with a distinct warning—different from the stud indication—showing wire location and approximate depth. Some models even display voltage range estimates. Never rely solely on this feature; always use a separate voltage tester before cutting or drilling, but consider wire detection your first line of defense.
Battery Life Considerations for Cordless Operation
Standard Battery Types and Their Performance
Most stud finders use either AAA batteries or built-in rechargeable lithium-ion cells. AAA-powered models offer the convenience of quick swaps when power dies, but voltage drops as batteries drain, potentially reducing accuracy. Lithium-ion models maintain consistent voltage until nearly depleted, ensuring reliable readings throughout the charge cycle. They typically last 6-10 hours of active scanning per charge. Consider your usage patterns—occasional DIYers may prefer AAAs, while frequent users benefit from rechargeables.
Power-Saving Features to Look For
Auto-shutoff after 5-10 minutes of inactivity prevents dead batteries when you forget to power down. Some premium models enter a low-power sleep mode when stationary, waking instantly when moved. LCD screens should dim automatically in well-lit conditions to conserve energy. The power button should require deliberate pressing—accidental activation in a toolbox can drain batteries unnecessarily. These features separate thoughtful engineering from basic functionality.
Low Battery Indicators and Auto-Shutoff
A flashing icon or persistent beep when batteries run low gives you time to replace them before accuracy degrades. The best tools maintain calibration data during battery swaps, so you don’t need to recalibrate after changing cells. Auto-shutoff should be gradual—first warning you, then saving settings, before finally powering down. Beware of models that simply die mid-scan without warning, leaving you guessing whether you found a stud or the battery quit.
Scanning Modes Explained
Stud Scan Mode
This is your everyday mode for finding wooden or metal studs through standard ½-inch or 5/8-inch drywall. It typically scans ¾-inch to 1 inch deep, providing the fastest, most accurate results for common walls. The tool discriminates against pipes and wires, focusing on the consistent density pattern of a stud. Use this mode first for any project; only switch to deeper modes if you get no readings or suspect thicker wall materials.
Deep Scan Mode
When stud scan mode fails to locate anything, deep scan penetrates further—up to 1½ inches or more. This mode uses more battery power and scans slower, analyzing more data points to distinguish studs from background noise. It’s essential for plaster walls, double drywall, or walls with wood paneling over drywall. Expect more false positives; deep scan is a detection tool, not a precision instrument. Always verify deep scan findings with a secondary method.
Metal Scan Mode
Metal mode specifically locates ferrous and non-ferrous metals like copper pipes, conduit, or steel studs. It ignores wood entirely, making it perfect for mapping plumbing before bathroom renovations or finding metal framing in commercial buildings. Sensitivity is typically adjustable, letting you locate a metal pipe at 3 inches or a steel stud at 1 inch. This mode drains batteries quickly due to high-power signal emission.
AC Scan Mode
Dedicated AC detection mode scans exclusively for live electrical wires, often at greater depth than other modes. It provides approximate voltage ranges and wire path mapping. Use this mode before any demolition work, even if you’re not planning to drill into studs. Wires can run horizontally between outlets, and AC scan reveals these hidden dangers. Some tools combine this with other modes, but dedicated scanning provides clearer, more accurate results.
Accuracy Factors You Can’t Ignore
Wall Material and Texture Impact
Textured walls—popcorn, orange peel, or knockdown finishes—create air gaps that confuse sensors. The tool may detect texture peaks as density changes, causing false readings. Always press firmly to compress texture slightly (without damaging it) and move slower than you would on smooth drywall. Plaster walls contain lath strips and varying thickness, requiring deep scan mode and careful interpretation. Tile backer board and dense wallpaper can reduce effective scanning depth by 30-50%.
User Technique and Proper Movement
The best stud finder fails in untrained hands. Move at a consistent speed—about 1 inch per second—keeping the tool flat against the wall. Tilting even 5 degrees can shift readings by several inches. Overlap your scans by 50% to ensure no spots are missed. Mark stud edges lightly with painter’s tape as you find them, creating a physical map. Never scan in circles or back-and-forth motions; always move in one direction, reset, and scan again from the opposite direction to verify.
Interference from Pipes and Wires
Studs run vertically, 16 or 24 inches apart. Anything between studs at an angle is likely a pipe or wire. Pipes often run vertically too, but typically closer to corners or fixture locations. If you detect something narrower than 1½ inches wide, it’s probably not a stud. Cross-hatch your scans—run horizontal passes after vertical ones. Studs create consistent vertical lines; random intersections indicate utilities. When in doubt, scan adjacent walls to see if the pattern continues.
Price Tiers and What You Get at Each Level
Budget-Friendly Options Under $30
These tools find stud edges using basic LED indicators. They typically lack deep scan modes, have minimal wire detection, and use AAA batteries. Accuracy is acceptable for simple tasks like hanging pictures but expect false readings on textured walls. Calibration is manual and must be repeated frequently. They work, but require patience and verification. Consider these entry-level tools for renters or those who DIY once or twice a year.
Mid-Range Performance Tools ($30-$60)
This sweet spot offers center-finding technology, backlit LCD screens, and reliable wire detection. You’ll get multiple scanning depths, audio alerts, and auto-calibration. Battery life improves, often including low-power indicators. These tools handle textured walls and double drywall reasonably well. For homeowners who tackle monthly projects, this tier provides professional features without the professional price tag. Durability increases significantly, with better sensor protection and ergonomic grips.
Professional-Grade Features ($60+)
Expect full-color displays, multi-sensor arrays, and the ability to map entire wall sections. These tools detect studs, pipes, wires, and even rebar in concrete. They store scan data, allowing you to review wall maps later. Rechargeable lithium batteries with 10+ hour runtimes are standard. Accuracy reaches within 1/16 inch, and they calibrate automatically to any wall type. Contractors and serious DIYers who demand reliability and speed will find the investment pays for itself in avoided mistakes and time saved.
Common Mistakes That Lead to False Readings
Rushing the Scanning Process
Speed kills accuracy. Moving faster than 1 inch per second doesn’t give sensors time to process density changes. Your brain needs time to register alerts and mark positions. Slow, deliberate scans feel tedious but take less time than repairing a mistake. Set a pace where you can clearly see the display change as you cross a stud. If you’re scanning an entire room, budget 5-10 minutes per wall. The project you’re mounting will be on that wall for years; take 10 minutes to do it right.
Ignoring Calibration Steps
Every wall is different. Paint thickness, wallpaper, and even humidity affect readings. Calibrating on a known empty section of wall establishes the correct baseline. Some users calibrate over a stud, guaranteeing failure. Others skip calibration entirely, wondering why the tool beeps randomly. High-end tools auto-calibrate when powered on, but you should still place them on the wall and wait for the ready indicator. If your tool requires manual calibration, do it at the start of each scanning session and after any battery change.
Scanning Over Textured Surfaces
Texture creates micro-gaps that sensors misinterpret as density changes. Pressing too lightly reads these gaps; pressing too hard can damage the wall and still give false readings. The solution is firm, even pressure while moving slowly. For heavy textures like popcorn ceilings, consider smoothing a small path with a putty knife first. Some pros carry a thin piece of rigid plastic to place between the tool and heavily textured walls, creating a smooth scanning surface.
Safety Features That Protect You and Your Walls
Live Wire Detection Thresholds
Wire detection should alert on voltages as low as 90V, covering standard 120V household circuits. The tool must distinguish between stud density and electrical fields, using separate alert patterns. Look for models that show wire location independently of stud location, preventing confusion. The detection zone should be narrow enough to pinpoint wire position within ½ inch. Always test this feature on a known live outlet before trusting it on unknown walls.
Ergonomic Design for Extended Use
Scanning an entire house means holding the tool for extended periods. Sharp edges, heavy weight, and poor grip design cause hand fatigue, leading to sloppy technique. Quality tools have contoured grips with rubber overmolding, weighing under 8 ounces. The power button should be positioned where you can activate it without adjusting your grip. Balance matters too—a tool that’s top-heavy will tilt unconsciously, skewing readings.
Non-Marking Scanning Pads
The tool’s scanning surface should be smooth plastic that won’t scuff paint or leave residue. Some budget models have rough edges or protruding screws that scratch walls. Check that the pad is replaceable; after hundreds of scans, it can wear down or collect debris that affects readings. A quick wipe with a damp cloth before each use ensures consistent contact. Avoid tools with adhesive pads or rubber feet that can pull paint when removed.
How to Properly Use a Battery-Powered Stud Finder
Step-by-Step Wall Preparation
Clear the wall of pictures, nails, and outlet covers. These create false readings and can damage the sensor. Use a clean, dry cloth to wipe dust from the scanning path. For newly painted walls, wait 24-48 hours for the paint to fully cure; wet paint can interfere with readings. Remove furniture that forces you to stretch or reach, which compromises scanning stability. If scanning near crown molding or baseboards, note that studs rarely run closer than ½ inch from these trim pieces.
The Correct Scanning Motion
Place the tool flat against the wall at a height where you plan to mount your item. Power it on and wait for the calibration confirmation. Move horizontally at a steady 1-inch-per-second pace. When you detect a stud edge, mark it with light pencil or painter’s tape. Continue past the stud until the signal clears, then mark the opposite edge. Reset the tool, return 6 inches left of your first mark, and scan again to verify. For center-finding tools, simply mark when the display indicates the stud’s midpoint.
Marking and Verifying Your Findings
Never trust a single scan. After marking a stud’s center, scan vertically up and down from that point. A real stud creates a consistent vertical line. If your mark disappears after 12 inches, you likely detected a horizontal pipe or wire instead. Use a level to draw a light pencil line along the confirmed stud location. Before drilling, probe the area with a small finish nail to verify solid wood. This final confirmation takes seconds but prevents disasters.
Maintenance Tips to Extend Your Tool’s Lifespan
Battery Storage Best Practices
Remove batteries if you won’t use the tool for over a month. Alkaline batteries can leak and corrode contacts, destroying the tool. Store rechargeables at 50% charge in a cool, dry place. Extreme temperatures degrade battery capacity; never leave your stud finder in a garage that drops below freezing or exceeds 100°F. For lithium-ion models, charge every 3-4 months during storage to prevent deep discharge, which permanently damages cells.
Cleaning Sensor Pads
Dust and drywall compound buildup on the scanning pad insulates the sensor, reducing accuracy. Clean the pad weekly during heavy use with isopropyl alcohol and a lint-free cloth. Never use water, which can seep into the housing. Check for scratches that create air gaps; deeply scratched pads need replacement. Some manufacturers sell replacement pads, while others require professional service. A clean pad ensures consistent contact and reliable readings.
Firmware Updates for Smart Models
High-end stud finders with Bluetooth connectivity and smartphone apps receive firmware updates that improve detection algorithms. Check for updates quarterly, as manufacturers refine their software based on field data. These updates can increase scanning speed, reduce false positives, and even add new features. Connect your tool to its app at least once per project to sync scan data and check for updates. Ignoring firmware updates leaves performance improvements on the table.
When to Use Alternative Locating Methods
Old-School Tapping Techniques
Even with a perfect stud finder, tap the wall lightly with your knuckle. A solid “thud” confirms the electronic reading, while a hollow sound suggests a false positive. This dual-verification method catches errors before you drill. Tapping also reveals stud width; the solid sound should span 1½ inches for a standard 2x4. If your tap sounds solid across 4 inches, you may have found a horizontal blocking piece, not a vertical stud.
Using Reference Points
Studs are typically spaced 16 or 24 inches on-center. Once you find one stud, measure 16 inches in either direction to locate the next. Check near corners—studs are usually placed within ½ inch of adjacent walls. Outlet boxes are nailed to studs; remove the cover plate to see which side the stud is on. These reference points help you quickly verify electronic findings and identify when a tool is giving false readings.
Knowing When to Call a Professional
If your stud finder gives inconsistent results after multiple scans, or you detect utilities running in unexpected patterns, stop. Walls in older homes may have fire blocks, diagonal bracing, or outdated wiring that confuses even professional tools. A contractor with ground-penetrating radar can map your walls accurately for $150-$300. That’s expensive, but cheaper than repairing structural damage or electrical hazards. When safety is uncertain, professional verification is the only smart option.
The Environmental Impact of Battery-Powered Tools
Rechargeable vs. Disposable Battery Considerations
AAA-powered stud finders contribute to battery waste; even rechargeable AAAs have limited cycles before replacement. Lithium-ion models, while initially more resource-intensive to manufacture, last 5-7 years with daily use. Over a tool’s lifetime, rechargeables prevent hundreds of disposable batteries from entering landfills. When the lithium battery eventually fails, manufacturers increasingly offer recycling programs to recover valuable metals. Factor in total environmental cost, not just upfront convenience.
Sustainable Manufacturing Practices
Tool manufacturers are shifting to recycled plastics for housings and reducing packaging waste. Some brands now offer repairable designs with replaceable sensor modules, extending tool life beyond the typical 3-5 year disposable cycle. Look for companies with ISO 14001 environmental certification. While not directly affecting performance, supporting sustainable brands encourages industry-wide improvements. A slightly higher price for an eco-conscious tool pays environmental dividends over time.
Warranty and Support: What to Expect
Standard Warranty Coverage
Stud finders typically carry 1-2 year warranties covering manufacturing defects. Professional-grade tools may offer 3-year warranties with registration. Read the fine print—damage from battery leakage often isn’t covered, making proper battery storage critical. Water damage voids most warranties, so keep your tool dry. Save your receipt and register the product online within 30 days. Some manufacturers extend warranties by an additional year for registered users.
Customer Support Availability
Quality brands offer phone support during business hours and respond to email inquiries within 24-48 hours. Check online reviews specifically mentioning customer service experiences. Companies that provide firmware updates and calibration guides demonstrate long-term product support. Avoid brands with only automated support or those that require you to mail tools for simple troubleshooting. Good support includes video tutorials, downloadable manuals, and active user forums where experienced contractors share tips.
Frequently Asked Questions
How thick of a wall can a battery-powered stud finder actually scan through?
Standard mode penetrates ¾-inch to 1 inch, handling single-layer drywall perfectly. Deep scan modes reach 1½ to 3 inches, managing plaster, double drywall, or tile backer board. Beyond 3 inches, accuracy drops significantly, and you should consider professional-grade wall scanners or ground-penetrating radar for concrete or masonry walls.
Why does my stud finder beep randomly even when I’m not over a stud?
Random beeping usually indicates improper calibration, low batteries, or scanning over textured surfaces. Calibrate on a clear wall section, replace batteries if the low-power indicator is on, and ensure the scanning pad maintains firm, even contact. Electrical interference from nearby devices can also cause false readings—try scanning with WiFi routers and fluorescent lights turned off.
Can stud finders detect plastic pipes or PVC?
Most electronic stud finders struggle with PVC because its density is similar to air-filled wall cavities. Some high-end models with multi-sensor arrays can detect larger PVC pipes (1½ inches or more) by sensing the water inside, but results are inconsistent. For plastic pipe detection, consider a thermal imaging camera that shows temperature differences in active water lines.
What’s the difference between a stud finder and a wall scanner?
Stud finders locate studs and sometimes wires. Wall scanners are more advanced, creating detailed maps of everything behind drywall—studs, pipes, wires, and even pests. They cost significantly more and are overkill for simple hanging projects. Think of stud finders as precision tools for specific tasks, while wall scanners are diagnostic devices for major renovations.
How do I know if my stud finder is calibrated correctly?
After calibration, scan a section of wall where you know there’s no stud (between outlets, far from corners). The tool should show no readings. Then scan over a known stud location, like beside an electrical outlet box. It should detect the stud within 1 inch of the outlet’s edge. If it fails either test, recalibrate or check battery voltage.
Will a stud finder work on lath and plaster walls?
Yes, but with limitations. Lath and plaster creates a dense, inconsistent background that confuses basic sensors. Use deep scan mode and move very slowly. Expect more false positives from lath strips. Verify every finding by tapping and measuring from known reference points. Some professionals scan lath walls from the backside (in attics or basements) where possible for clearer results.
Can I use a stud finder on exterior walls with insulation?
Standard insulation (fiberglass, cellulose) doesn’t significantly affect readings, but it reduces effective scanning depth by about ¼ inch. Scanning through foam board insulation is nearly impossible; it blocks the sensor’s field. For insulated exterior walls, use deep scan mode and verify findings by measuring from interior corners where studs must be present.
Why do I get different readings when scanning from left vs. right?
This usually indicates uneven wall density or user technique issues. The tool may detect density changes differently depending on approach angle. Always scan in both directions and mark the center between your left-to-right and right-to-left readings. Consistent discrepancies suggest wall damage or repairs that altered the stud’s density on one side.
How long should batteries last in a typical stud finder?
With intermittent use (a few scans per month), AAA batteries last 6-12 months. Heavy daily use drains them in 20-30 hours of active scanning. Lithium-ion rechargeables provide 8-10 hours of continuous use per charge, maintaining consistent voltage throughout. Always remove batteries during long-term storage to prevent leakage damage.
Is it worth buying a stud finder with Bluetooth connectivity?
For most homeowners, Bluetooth is a luxury, not a necessity. It allows you to save scan maps on your phone, which is valuable for large projects or rental properties where you need to reference wall layouts later. Contractors benefit from documenting findings for clients. If you just need to hang a TV, skip the connectivity and save money. For whole-house renovations or professional use, the documentation feature justifies the premium.
See Also
- 10 Essential Battery-Powered Stud Finders Every Homeowner Needs in 2026
- The 10 Most Revolutionary Battery-Powered Stud Finders of 2026
- The 10 Ultimate Best Battery-Powered Stud Finders for On-Site Jobs in 2026
- Stop Guessing Locations with the 10 Best Precision Stud Finders This Year
- 10 Affordable Digital Stud Finders That Don’t Sacrifice Accuracy in 2026