Table of Contents
Your heating system works overtime every winter, yet your energy bills keep climbing. The culprit? Those beautiful windows that frame your views are also framing a silent energy heist. Up to 30% of your home’s heating energy literally flies out the window through air leaks and heat transfer, according to the U.S. Department of Energy. While replacing windows costs thousands, window insulation kits offer a remarkably effective alternative that pays for itself in a single season. This year, smarter materials and installation techniques have transformed these budget-friendly solutions from temporary fixes into strategic energy-saving investments that rival permanent upgrades.
Understanding how to select and install the right insulation kit isn’t just about saving money—it’s about creating a more comfortable, consistent living environment while reducing your carbon footprint. Whether you’re battling drafty historic windows in a century-old brownstone or looking to boost efficiency in a modern home, the right approach can cut heat loss by 50% or more. Let’s dive deep into everything you need to know to make an informed decision and execute a flawless installation that will keep you warm without draining your wallet.
Top 10 Window Insulation Kits For Energy
Detailed Product Reviews
1. Duck Brand Window Insulation Kit - Winter Seal Kit Fits up to 10 Windows - Rolled Shrink Film Cuts to Size for Easy Indoor Installation - Tape Included - 62 In. by 420 In.- Clear
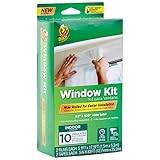
Overview: This standard-grade window insulation kit from Duck Brand delivers a practical solution for homeowners seeking to reduce winter heating costs. The package includes two generous rolls of clear shrink film (62" x 210" each) and two rolls of double-sided tape, providing enough material to seal up to ten 3’ x 5’ windows. Designed for indoor application, it creates an airtight barrier against drafts while maintaining visibility.
What Makes It Stand Out: The rolled format eliminates measuring guesswork, allowing you to unroll and cut precisely to each window’s dimensions. The film remains crystal clear after heat-shrinking, preserving natural light and views. Unlike pre-cut sheets, this continuous roll adapts to non-standard window shapes and sizes, making it ideal for older homes with varied architectural details. The included tape quantity (83 feet per roll) is notably generous.
Value for Money: Priced competitively for mid-range budgets, this kit offers strong ROI through measurable energy savings. The ten-window capacity makes it suitable for most apartments or small houses. Compared to buying individual window kits, the bulk roll format reduces waste and cost per window by approximately 15-20%, while the ample tape supply prevents mid-project shortages.
Strengths and Weaknesses:
- Strengths: Generous tape length; adaptable roll format; clear post-installation visibility; covers many windows; easy removal in spring.
- Weaknesses: Standard thickness tears more easily during installation; requires careful hair dryer technique; tape adhesion can fail on dirty surfaces; not ideal for high-traffic areas.
Bottom Line: An excellent choice for budget-conscious homeowners in moderate climates who need to seal multiple standard windows. The generous tape supply and adaptable roll format outweigh the standard film’s moderate durability. Perfect for seasonal use in homes without pets or children pressing against windows.
2. Duck MAX Strength Window Insulation Kit, Winter Window Seal Kit Fits up to 10 Windows, Heavy Duty Shrink Film Cuts to Size for Easy Indoor Installation, Window Tape Included,62 In. x 420 In., Clear

Overview: The MAX Strength variant upgrades Duck Brand’s standard offering with puncture-resistant, twice-as-thick film for superior draft protection. This ten-window kit includes two heavy-duty rolls (62" x 210" each) and two tape rolls, targeting homeowners facing harsh winters or high-traffic window areas. The enhanced durability maintains the same straightforward installation process.
What Makes It Stand Out: The 2X thickness dramatically reduces installation tears and post-application punctures from blinds, curtains, or accidental contact. This robust barrier provides measurably better insulation performance in extreme cold, making it ideal for northern climates. The film still shrinks to a taut, transparent finish with proper heating, combining durability with aesthetics.
Value for Money: While priced 30-40% higher than the standard version, the MAX Strength kit justifies its premium through reduced material waste and extended reusability. The thicker film withstands repositioning during installation, saving replacement costs. However, the tape supply (54 feet per roll) is surprisingly shorter than the standard kit, potentially limiting coverage for larger windows.
Strengths and Weaknesses:
- Strengths: Superior puncture resistance; excellent for extreme cold; reduced installation waste; maintains clarity; professional-grade durability.
- Weaknesses: Shorter tape length than standard version; higher upfront cost; requires more hair dryer heat to shrink; overkill for mild climates.
Bottom Line: Best suited for homes in severe winter regions or with active households where window durability matters. The thicker film’s performance justifies the price premium, but verify your window dimensions to ensure the reduced tape length suffices. A smart investment for long-term seasonal use.
3. Duck MAX Strength Window Insulation Kit, Winter Window Seal Kit Fits up to 5 Windows, Heavy Duty Shrink Film Cuts to Size for Easy Indoor Installation, Window Tape Included,62 In. x 210 In., Clear
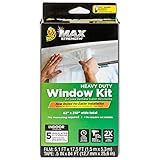
Overview: This compact MAX Strength kit scales down the heavy-duty protection to a five-window package, perfect for apartments or single-room applications. It includes one roll of the same puncture-resistant, double-thick film (62" x 210") and a generous 84-foot tape roll. The kit delivers professional-grade insulation for smaller spaces without bulk packaging.
What Makes It Stand Out: The single-roll format minimizes storage waste while providing the same 2X thickness protection as its larger counterpart. The unusually generous tape length (84 feet) offers flexibility for larger or irregularly shaped windows within the five-window capacity. This combination makes it ideal for renters needing maximum protection in a few critical windows.
Value for Money: Positioned as a premium small-scale solution, it costs more per window than the ten-window MAX version but eliminates overbuying. The ample tape supply adds value, often eliminating the need for additional purchases. For insulating just a bedroom or living area, it’s more economical than purchasing a larger kit with unused material.
Strengths and Weaknesses:
- Strengths: Heavy-duty protection for small spaces; excellent tape quantity; minimal storage required; perfect for renters; reduces material waste.
- Weaknesses: Highest cost per window; limited coverage; same heat requirements as larger version; may be excessive for mild climates.
Bottom Line: Ideal for apartment dwellers or homeowners targeting specific drafty rooms. The generous tape and heavy-duty film make it the best small-kit option for severe cold. While pricey on a per-window basis, it eliminates waste and provides superior protection where it matters most.
4. Duck Brand Winter Window Insulation Kit – Window Seal Rolled Shrink Film Covers Up to 15 3’ x 5’ Windows – Window Tape Included – Easy Indoor Installation - Clear - 15-Pack (288069)

Overview: This bulk 15-window kit serves as the standard-grade workhorse for larger homes, containing three rolls of clear shrink film (62" x 210" each) and three tape rolls. Designed for comprehensive whole-house insulation, it delivers the same moderate-duty protection as the ten-window version but scales capacity for extensive coverage. The multi-roll packaging allows simultaneous room-by-room installation.
What Makes It Stand Out: The 15-window capacity offers the lowest per-window cost in Duck’s standard lineup, making it ideal for insulating entire floors or multi-story homes. Having three separate film rolls prevents contamination or damage to unused material during installation. The segmented packaging is particularly practical for tackling projects over multiple weekends.
Value for Money: This kit provides the best bulk pricing, reducing per-window cost by 20-25% compared to smaller standard kits. For homes with 12+ windows, the savings are substantial. However, each tape roll contains only 54 feet, which may require conservative application or supplemental tape purchases for windows exceeding standard dimensions.
Strengths and Weaknesses:
- Strengths: Best bulk value; segmented rolls prevent waste; comprehensive whole-house solution; maintains clarity; easy seasonal removal.
- Weaknesses: Standard film durability concerns; shorter tape per roll; requires significant installation time; overbuying risk for smaller homes.
Bottom Line: The optimal choice for large homes or property managers winterizing multiple units. The bulk savings and roll segmentation justify the purchase if you have the window count to match. Ensure you have enough tape for non-standard windows, and handle the film carefully during installation.
5. Duck Brand Indoor 5-Window Shrink Film Insulator Kit, 62-Inch x 210-Inch, 286217
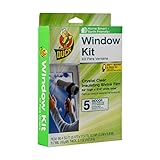
Overview: This standard-grade five-window kit represents Duck Brand’s entry-level offering for small-scale insulation projects. The package includes one roll of clear shrink film (62" x 210") and an 84-foot double-sided tape roll. It provides essential draft protection for a few critical windows without the complexity of larger kits, targeting budget-conscious renters and homeowners.
What Makes It Stand Out: The generous 84-foot tape length exceeds what’s provided in many larger kits, offering exceptional flexibility for irregular window frames or application errors. Its minimalist packaging reduces environmental waste while delivering exactly enough material for a typical apartment’s main living spaces. The straightforward single-roll format simplifies storage and inventory.
Value for Money: As the most affordable per-kit option, it delivers solid value for those needing minimal coverage. The abundant tape supply eliminates a common frustration in small kits. However, the per-window cost runs higher than bulk options, making it less economical for whole-house applications. It’s essentially the standard version of the five-window MAX kit.
Strengths and Weaknesses:
- Strengths: Excellent tape quantity; lowest upfront cost; minimal packaging waste; perfect for small rentals; easy to handle.
- Weaknesses: Standard film punctures easily; limited coverage; higher per-window cost; requires pristine surface prep; not suitable for extreme cold.
Bottom Line: A practical starter kit for renters or homeowners in mild-to-moderate climates with only a few drafty windows. The generous tape supply compensates for the standard film’s durability limitations. Choose this for cost-effective, small-scale seasonal insulation without committing to bulk materials.
6. Frost King V73/9H Indoor Shrink Window Kit 42 62-Inch, Clear, 9-Pack
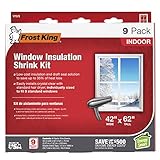
Overview: The Frost King V73/9H delivers a bulk solution for winterizing multiple windows, providing nine 42" x 62" shrink film kits in one package. Designed for standard windows, this product targets homeowners seeking to seal drafts across several rooms cost-effectively. The manufacturer emphasizes durability and simplicity, positioning it as a straightforward seasonal insulation option.
What Makes It Stand Out: The nine-pack quantity is the defining feature, making it ideal for larger homes or multi-year planning. The kit uses standard heat-shrink technology activated with a hair dryer, creating a transparent barrier against cold air infiltration. Its “made in China” manufacturing keeps costs low while maintaining functional performance for basic insulation needs.
Value for Money: Bulk pricing makes each window’s cost significantly lower than individual kits, offering immediate savings. However, the requirement for annual replacement and potential tape failure under sunlight exposure diminishes long-term value. Factor in recurring labor and material costs each heating season, making this a disposable solution rather than a lasting investment.
Strengths and Weaknesses: Strengths include exceptional quantity value, straightforward installation, and adequate single-season performance. The bulk packaging reduces per-unit cost substantially. Weaknesses involve mandatory yearly reapplication, adhesive degradation from UV exposure, eventual tape failure under stress, and ongoing waste generation. The disposable nature demands repeated effort each winter.
Bottom Line: For budget-conscious homeowners needing immediate multi-window coverage, the Frost King 9-pack delivers acceptable short-term performance. Accept annual reinstallation and monitor tape adhesion mid-season. Consider this a functional, seasonal commodity rather than a premium investment—perfect for rentals or temporary situations where cost trumps longevity.
7. 3M Indoor Window Insulation, Insulator Kit for 5 Windows 3ft x 5ft, Keeps Cold Air Out and Warm Air In, Includes Heat Shrink Window Film and Scotch Window Film Mounting Tape (2141W-6)

Overview: 3M’s reputable entry provides a complete kit for five standard 3’ x 5’ windows, leveraging decades of adhesive expertise. The package includes proprietary Scotch mounting tape and heat-shrink film engineered to create an effective thermal barrier. This solution targets energy-conscious homeowners seeking reliable draft reduction without permanent modifications.
What Makes It Stand Out: The 3M brand name carries significant weight, promising consistent quality control and proven adhesive technology. The kit specifically addresses energy savings and condensation reduction—critical winter concerns. A one-year limited warranty provides basic defect protection, though restrictive terms limit comprehensive coverage for consequential issues.
Value for Money: Priced at a premium over generics, you’re investing in brand trust and reliable tape performance. The per-window cost remains moderate but justified by consistent results and minimal installation failures. Warranty value is nominal due to limitation-of-liability clauses, but the 3M name reduces risk of product defects.
Strengths and Weaknesses: Strengths include trusted brand quality, effective condensation control, quick installation, and superior tape adhesion that reduces mid-season failures. The warranty offers limited peace of mind. Weaknesses involve higher upfront cost, fixed five-window coverage, and warranty exclusions favoring the manufacturer. The kit lacks flexibility for non-standard window sizes.
Bottom Line: Choose this kit for reliable, hassle-free installation on standard windows where brand reputation matters. The performance justifies the modest premium, making it a solid middle-ground option between budget and specialized solutions. Expect dependable results with minimal complications—ideal for homeowners prioritizing consistency over cutting-edge features.
8. Window Insulation Kit for Winter,Plastic Shrink Film & Strong Tape, Indoor Thermal Seal to Block Drafts, Cold Air for Windows and Patio Doors,5-Pack(42"W x 62"T)

Overview: This five-pack delivers a versatile winterizing solution for standard windows and patio doors using premium POF (polyolefin) material. Each 42" x 62" sheet heat-shrinks to form a transparent draft barrier. The manufacturer emphasizes both installation simplicity and clean removal, positioning it as a renter-friendly, DIY-focused option.
What Makes It Stand Out: The POF material offers superior clarity and UV resistance compared to traditional PVC films. Reinforced double-sided tape adheres securely to painted wood, aluminum, and PVC frames—a versatility many competitors lack. Most notably, the residue-free removal promises eliminate the sticky cleanup that plagues other kits, making spring takedown effortless.
Value for Money: Positioned competitively between budget and premium brands, this kit provides professional-grade materials without the 3M price tag. Five-window coverage matches standard needs while multi-surface compatibility reduces installation failures. The clean-removal feature adds significant value for rental properties or meticulous homeowners concerned about surface damage.
Strengths and Weaknesses: Strengths include excellent material quality, broad surface compatibility, clean removal, and versatile window-type applicability. UV resistance extends functional lifespan. Weaknesses involve unspecified warranty details, lack of brand recognition, and potential tape variability across extreme temperature ranges. The film remains single-use despite storage claims.
Bottom Line: This kit excels for DIYers wanting near-premium performance without brand premiums. The residue-free removal and versatile adhesion make it particularly attractive for rentals or careful homeowners. A strong all-around performer that balances cost, quality, and convenience effectively—recommended for those prioritizing clean installation and removal over maximum brand assurance.
9. TECUUL Window Insulation Kit for Winter 63’‘X63’’, Reusable Clear Window Film, Non-Cutting Thick Plastic wtih Velcro Tape and Tacks, Rollable Window Curtain

Overview: TECUUL reimagines window insulation as a reusable, rollable curtain rather than disposable shrink film. The 63" x 63" EVA plastic sheet attaches via Velcro tape and tacks, creating a removable barrier that allows window operation without full removal. This innovation addresses a major limitation of traditional kits while promoting sustainability.
What Makes It Stand Out: The roll-up design with buckle straps enables unprecedented convenience—simply peel back the film for ventilation or cleaning. Reusability across multiple seasons transforms this from disposable supply to long-term investment. The EVA material provides year-round utility, blocking winter cold and retaining summer AC efficiency for continuous energy savings.
Value for Money: Higher initial cost is offset by multi-season reuse, eliminating annual repurchase expenses. The comprehensive kit includes film, 21ft of tape, 20 tacks, and storage straps. ROI becomes attractive after just two seasons, making it economical for homeowners prioritizing convenience and sustainability over absolute seal performance.
Strengths and Weaknesses: Strengths include reusability, window accessibility, year-round versatility, robust EVA construction, and innovative roll-up mechanism. Weaknesses involve more complex initial installation, potentially less airtight seal compared to heat-shrink films, and Velcro’s uncertain long-term adhesive durability. The 63" size may require creative sizing for larger windows.
Bottom Line: Ideal for those valuing convenience and sustainability over maximum seal performance. Perfect for windows requiring periodic access. While not achieving the airtight vacuum seal of shrink films, its practical flexibility and reuse make it a smart long-term investment for moderate climates or secondary rooms where occasional ventilation is preferred over absolute insulation.
10. Duck 286218 Extra Large Patio Door Shrink Film Window insulation kit, 1, Crystal Clear

Overview: Duck Brand addresses oversized openings with this specialized kit designed for patio doors and large windows. The generous 84" x 120" crystal-clear film provides comprehensive coverage for openings that standard kits cannot accommodate. This essential solution targets modern homes with expansive glass features where drafts create significant energy loss.
What Makes It Stand Out: The sheer size immediately distinguishes this product—most competitors max out at standard window dimensions. The crystal-clear formulation maintains visibility while creating an effective thermal barrier. Duck Brand includes 36 feet of double-sided tape, ensuring adequate perimeter sealing for large dimensions without requiring additional purchases.
Value for Money: As a specialized single-use kit, the per-square-foot cost remains reasonable despite higher absolute price. For patio doors, purchasing multiple standard kits would prove more expensive and less effective. Energy savings from covering large draft sources quickly recoup the investment, making it financially sensible for targeted applications.
Strengths and Weaknesses: Strengths include perfect sizing for patio doors, excellent clarity, sufficient tape length, and straightforward heat-shrinking. The single-kit packaging eliminates waste for one-time large applications. Weaknesses involve single-window coverage, potential tape shortage for complex frames, and the challenge of handling large film sheets without assistance or wrinkles.
Bottom Line: An indispensable solution for insulating oversized openings. If you have patio doors or large windows, this is your most practical option. While installation requires careful handling and patience due to size, the results justify the effort. Don’t compromise with smaller kits—this purpose-built solution delivers proper coverage and performance where generic alternatives fail.
Why Your Windows Are Secretly Draining Your Wallet
The Science Behind Heat Transfer Through Glass
Windows represent the weakest thermal link in your home’s building envelope. Heat escapes through three mechanisms: conduction (direct transfer through the glass), convection (air currents around the frame), and radiation (infrared heat passing through). Single-pane windows have an R-value of approximately R-1, while even double-pane windows typically rate only R-2 to R-3. This pales compared to your insulated walls at R-13 or higher. The temperature differential between your cozy 70°F interior and frigid outdoor air creates a pressure gradient that actively pulls warm air toward the glass, where it cools and sinks, creating uncomfortable drafts that you blame on “poor insulation” when it’s actually thermodynamics at work.
Quantifying Your Home’s Energy Loss
Before investing in solutions, you need to understand the scope of your problem. Perform a simple candle test on a windy day: hold a lit candle near window edges and watch the flame dance. Each flicker represents your heated air escaping and cold air infiltrating. Thermal imaging cameras, now affordable as smartphone attachments, reveal shocking heat signatures where windows glow like lightbulbs against cold walls. The average home loses enough energy through windows annually to power a refrigerator for three years. In monetary terms, poorly insulated windows can add $200-500 to your heating costs each winter, depending on your climate zone and energy rates.
Understanding Window Insulation Kits: Your First Line of Defense
What Exactly Is a Window Insulation Kit?
Window insulation kits are engineered systems designed to create an additional insulating barrier between your living space and the window surface. Most consist of a transparent film membrane and specialized adhesive system that creates a dead air space when properly installed. This trapped air becomes your secret weapon—still air is an excellent insulator, with every inch providing approximately R-1. When you create a 1-2 inch gap between film and glass, you’re essentially adding a storm window’s worth of insulation for less than $10 per window. Modern kits have evolved far beyond the clingy, yellowing plastic of decades past.
How These Kits Work to Stop Thermal Transfer
The genius lies in creating a sealed air gap that interrupts heat flow. When installed correctly, the film forms a tight barrier that prevents indoor air from contacting the cold glass surface. This eliminates convection currents and adds a crucial insulating layer. The transparent material itself is engineered to be thin enough to remain clear but strong enough to maintain that critical air seal. Some advanced films incorporate low-emissivity (Low-E) coatings that reflect radiant heat back into your room, boosting performance beyond simple air insulation. The result? Glass surface temperatures rise from near-freezing to room temperature, eliminating condensation and cold drafts simultaneously.
Types of Window Insulation Kits Explained
Shrink Film Kits: The Popular Choice
These ubiquitous kits feature heat-activated polyester film that tightens to a drum-like finish with a hair dryer. The shrinking process removes wrinkles and creates professional-looking clarity while ensuring the film remains taut enough to withstand temperature fluctuations without sagging. Quality films range from 0.75 to 1.5 mils thick, with premium versions offering multi-layer construction for enhanced durability. The adhesive is typically double-sided tape designed to create a continuous seal around the entire window frame, not just the glass perimeter. This is crucial—air leaks at the edges completely negate the insulating effect.
Magnetic Insulation Panels: The Reusable Solution
For those seeking a multi-season investment, magnetic systems consist of rigid or semi-rigid acrylic or polycarbonate panels that attach to steel magnetic tape applied around the window frame. These create a more robust air gap and can be removed and stored flat when not needed. The initial cost runs 3-5x higher than film kits, but five-year warranties and reusability make them economical for homeowners planning long-term energy improvements. The optical clarity rivals glass, and they eliminate the “plastic” aesthetic some find objectionable.
Foam Tape and Weatherstripping: The Gap Sealer
While not a complete insulation solution, high-density foam tape addresses the critical gap between sash and frame where air infiltration occurs. Closed-cell polyethylene foam with adhesive backing compresses to seal irregularities in old, warped wood windows. R-values are modest (R-3 to R-4 per inch), but stopping air leaks yields immediate comfort improvements. This approach works best combined with other methods, targeting the 25% of heat loss that occurs through cracks rather than glass.
Thermal Curtains and Cellular Shades: The Fabric Alternative
Honeycomb shades with cellular construction trap air in vertical columns, providing R-values of R-4 to R-6 when closed. While not technically “kits,” many manufacturers now offer DIY mounting systems. The key is ensuring side tracks that prevent air bypass around edges. These solutions offer the advantage of daily operability—unlike film, you can open them on sunny winter days to gain free solar heat. The trade-off is reduced natural light when closed and higher upfront costs.
Rigid Foam Boards: The Heavy-Duty Option
For unused windows or extreme climates, 1-inch extruded polystyrene (XPS) foam board cut to fit inside the window frame provides R-5 insulation. Foil-faced versions add radiant barrier properties. These completely block light and views, making them suitable for basements, attics, or seasonal homes. Installation requires precise measuring and may involve securing with magnetic tape or friction fit. This nuclear option stops nearly all heat transfer but sacrifices functionality.
Key Features That Separate Good Kits from Great Ones
Clarity and Light Transmission
Premium films maintain 90%+ visible light transmission, ensuring rooms don’t feel cave-like. Look for “optical grade” or “crystal clear” designations. Lower-quality films can drop to 80% transmission, noticeably dimming spaces. Anti-glare coatings reduce winter sun reflection, while UV inhibitors prevent yellowing that turns clear plastic into amber over time. Test by holding the film up to light before installation—any haze or distortion will be magnified across your entire window.
Adhesive Strength and Clean Removal
The adhesive system makes or breaks your installation and your paint job. Acrylic-based adhesives provide stronger bonds than rubber-based but require careful removal techniques. Look for “clean release” guarantees and test in an inconspicuous corner first. The adhesive should hold firmly in temperature swings from -20°F to 120°F but release without pulling paint or leaving residue. Some kits now include primer pens for porous surfaces like bare wood or stucco, ensuring reliable adhesion where standard tape fails.
Durability and Puncture Resistance
Pets, children, and daily life test your installation’s resilience. Thicker films (1.5 mil) resist tears better than standard 0.75 mil versions. Multi-layer laminates with reinforcing grids can survive minor impacts that would shred basic film. Consider your household activity level—high-traffic areas need heavier-duty materials. Some premium kits include repair patches that blend invisibly into the film, extending lifespan if damage occurs.
Reusability Factor
Most film kits are single-season disposable, but some magnetic and rigid systems offer decade-long lifespans. Calculate cost-per-year when comparing options. A $50 reusable system used for five years costs less annually than a $15 single-use kit. Storage matters—rigid panels need flat, protected spaces, while magnetic tape remains on frames year-round. Factor in your willingness to store components seasonally when evaluating reusability claims.
UV Protection and Anti-Yellowing Technology
Prolonged sun exposure degrades cheap plastics, causing brittleness and discoloration. Quality films contain UV stabilizers that block 98% of harmful rays, protecting both the film and your interior furnishings. Look for ASTM D4329 testing certification, which simulates years of sun exposure in accelerated conditions. This is especially critical for south-facing windows that receive maximum solar radiation. Yellowed film not only looks terrible but loses structural integrity, creating mid-season failures.
Measuring and Sizing: The Foundation of Success
How to Accurately Measure Your Windows
Precision matters more than you think. Measure width and height at three points each—top, middle, bottom for width; left, center, right for height. Use the smallest measurement to ensure coverage. Add 2-3 inches to each dimension for overlap onto the frame, not just the glass. For film kits, you’ll apply tape to the frame perimeter, so measure to the outside edges. Record measurements in a spreadsheet with window locations; this prevents confusion and ensures you buy adequate material. Don’t forget to measure depth—deep window sills may require extension techniques.
Dealing with Non-Standard Window Sizes
Arched, circular, and bay windows intimidate many DIYers, but they’re manageable with the right approach. For curves, create paper templates first, then transfer to film. Overlap multiple film strips by 1 inch, sealing the seam with clear packing tape on both sides before shrinking. Bay windows require treating each pane separately for best results. Some manufacturers offer oversized rolls (62" wide) specifically for picture windows. When in doubt, buy 20% more material than calculated—running short mid-installation leads to compromised results.
The Importance of Overlap and Coverage
Insufficient overlap onto the frame is the number one cause of kit failure. The adhesive needs at least 1 inch of clean, flat surface to maintain a seal through temperature cycling. On textured surfaces like rough wood or brick, extend overlap to 2 inches and consider using adhesive promoter. The film should cover the entire window unit, including frames, not just the glass. This creates a continuous thermal barrier and prevents cold bridging at the edges where glass meets frame. Remember: you’re insulating the whole opening, not just the transparent part.
Installation Mastery: Pro Tips for Flawless Application
Surface Preparation: The Make-or-Break Step
Adhesive won’t bond to dust, moisture, or deteriorated surfaces. Clean frames with isopropyl alcohol, not just household cleaners that leave residues. Scrape off old paint flakes and sand glossy surfaces lightly for better adhesion. Wait 24 hours after cleaning before applying tape—moisture trapped beneath adhesive causes premature failure. In humid climates, run a dehumidifier in the room for a day before installation. Temperature matters too; apply tape when surfaces are above 50°F for optimal bonding. This prep work seems tedious but determines whether your installation lasts five months or five weeks.
Tools You’ll Need Beyond the Kit
The kit provides film and tape, but professional results require specific tools: a hair dryer with concentrator nozzle (not a heat gun, which melts film), a plastic squeegee or credit card for smoothing tape, sharp scissors or a utility knife with fresh blades, microfiber cloths for cleaning, and painter’s tape for temporary holding. A laser thermometer helps verify seal quality—spot-check frame temperatures after installation; consistent readings indicate good coverage. Keep a needle and transparent tape handy for repairs. Some experts use a small rubber roller to ensure tape adhesion on irregular surfaces.
The Hair Dryer Technique: Avoiding Common Pitfalls
The shrinking phase intimidates newcomers, but the principle is simple: heat shrinks, cold stops it. Work from top to bottom in slow, overlapping passes, keeping the dryer 4-6 inches away. Never focus heat in one spot—keep the dryer moving to prevent melting. The film will tighten with a satisfying drum-like sound. Stop when wrinkles disappear and the surface is taut but not straining at the edges. Over-shrinking pulls tape off frames; under-shrinking leaves saggy, unprofessional results. Practice on a small scrap first to get a feel for your specific dryer’s heat output. High-wattage dryers (1875W) work faster but require more care than lower-powered models.
Working with Bay Windows and Odd Shapes
Bay windows need individual treatment for each panel. Start with the center window, then work outward, overlapping film at the corners by 2 inches. Use a hair dryer to seal overlapping seams before final shrinking. For arched tops, apply horizontal strips of tape following the curve, then cut film to match. Small pleats at the curve’s peak are acceptable and disappear when shrunk. Casement windows require removing the crank handle first—most unscrew easily. Cover the entire unit, including hardware, then cut a small X over the crank stem and seal around it with additional tape. Awning windows need bottom-up shrinking to prevent water pooling in the frame.
Cost Analysis: Investment vs. Long-Term Savings
Upfront Costs Breakdown
Basic film kits start at $8-12 per window, covering approximately 3x5 feet. Premium kits with thicker film and advanced adhesives run $15-25 per window. Magnetic systems cost $40-80 per window initially, while cellular shades range from $60-150 depending on size and brand. Don’t forget hidden costs: a quality hair dryer ($25-40 if you don’t own one), cleaning supplies ($10-15), and potential trim paint for touch-ups ($15). For a whole house (15 windows), budget $200-400 for film kits or $800-1,500 for reusable systems. Compare this to window replacement at $500-1,000 per window, and the value proposition becomes clear.
Calculating Your ROI Through Reduced Energy Bills
Energy savings vary dramatically by climate and existing window condition. In Zone 5 (Chicago, Boston), insulating single-pane windows typically reduces heating costs by 15-25%. With average winter heating bills of $200/month, that’s $90-150 saved over a five-month heating season. The payback period for a $200 whole-house kit investment is 1.3-2.2 years. Double-pane windows see more modest 5-10% improvements, but the comfort gain is substantial. Use the EPA’s Home Energy Yardstick tool to baseline your home’s performance, then measure again after installation. Many utility companies offer rebates ($25-75) for documented energy improvements, further shortening payback.
Hidden Costs to Consider
Failed installations cost more than just materials. Peeling tape can pull paint, requiring $50-100 in touch-up supplies and labor. Low-quality film that yellows mid-season means buying replacement kits. Time investment is real—plan 30-45 minutes per window for first-timers, 15-20 minutes once experienced. For renters, some landlords charge damage fees for adhesive residue, making removable magnetic systems smarter despite higher cost. Factor in disposal—PVC films aren’t recyclable in most municipalities, creating environmental costs. Reusable systems eliminate this waste stream entirely.
DIY vs. Professional Installation: Making the Right Choice
When DIY Makes Perfect Sense
If you can operate a hair dryer and measure accurately, you can handle standard film kits. DIY is ideal for standard double-hung windows in good condition, accessible without ladders, and when you have time for meticulous prep work. The learning curve is gentle, and mistakes are cheap to fix. Most homeowners successfully install 90% of their windows while struggling with only the most challenging ones. DIY also allows incremental installation—tackle the coldest rooms first and spread costs over several weekends. Your attention to detail often exceeds a contractor rushing through multiple jobs.
Scenarios That Call for Professional Help
Historic homes with deteriorating frames need carpentry skills before any film installation. Professionals can repair rotted wood, stabilize glazing, and ensure insulation doesn’t trap moisture that accelerates decay. Second-story windows requiring ladder work pose safety risks—contractors carry insurance you don’t. Complicated installations like interior storm windows with magnetic seals benefit from expert measurement and fitting. If you’re insulating for medical reasons (severe allergies requiring sterile environments), professionals with HEPA equipment justify their $50-75 per window cost. Some utilities offer subsidized professional installation for low-income households, making it cheaper than DIY.
The Middle Ground: Hybrid Approaches
The smartest strategy combines both approaches. Install film kits yourself on accessible, standard windows. Hire professionals for problem windows: large picture windows, fragile antique glass, or difficult architectural features. Many contractors will consult for a flat fee ($150-200), inspecting your home and identifying which windows benefit most from which solutions. They’ll point out air leaks you missed and recommend specific kit types for each situation. This diagnostic service pays for itself by preventing wasted materials on inappropriate solutions.
Common Mistakes That Doom Insulation Projects
Rushing the Cleaning Phase
That 5-minute wipe-down seems sufficient, but invisible oils from fingerprints and furniture polish residue prevent tape adhesion. The film fails at week three when you notice peeling corners. Spend 10 minutes per window cleaning with isopropyl alcohol, using multiple cloths to avoid recontamination. Clean twice—once the day before, then again right before installation. This removes airborne dust that settled overnight. In kitchens, grease particles require TSP substitute cleaner. The tape’s adhesive is designed for medical-grade bonding; give it a pristine surface and it will hold until you choose to remove it.
Stretching Film Too Tight or Too Loose
Beginners either pull film drum-tight before shrinking (causing tape failure during heating) or leave it sagging (creating uninsulated air pockets). The correct technique: apply film with minimal tension, just enough to remove major slack. Let the heat do the work of tightening. The film should hang like a loose shower curtain before you power up the hair dryer. During shrinking, stop the moment wrinkles disappear. Over-shrunk film puts continuous stress on adhesive, leading to mid-winter failures. Under-shrunk film reduces insulation performance. The sweet spot is taut but not strained—tap it gently; it should sound like a soft drum, not a tight snare.
Ignoring the Window Frame Itself
Focusing only on the glass while neglecting the frame is like patching a boat hull but ignoring the leaking seams. Up to 40% of window heat loss occurs through the frame, especially metal frames that act as thermal bridges. Apply foam tape between sash and frame before installing film. For metal frames, consider adding thin strips of rigid foam insulation covered by the film. Wood frames with gaps wider than 1/8 inch need backer rod and caulk before taping. The goal is creating a continuous thermal envelope, not just a glass cover.
Poor Sealing Around Edges
Gaps as small as 1/16 inch at tape edges destroy insulation performance. Air infiltration follows the path of least resistance, and even tiny gaps allow convective loops that bypass your film entirely. After applying tape, run a plastic squeegee along the edge with firm pressure to ensure full contact. Use a toothpick to press tape into corners and along irregular surfaces. Some pros apply a thin bead of clear silicone caulk over tape edges on extremely rough surfaces, though this complicates removal. Test your seal by running a lit incense stick around the perimeter; smoke should not be disturbed. If it wavers, you have a leak to fix.
Seasonal Strategies for Maximum Efficiency
Fall Preparation: Beating the Cold Rush
Install kits in early fall when temperatures are still mild (50-70°F). Adhesive bonds best in this range, and you avoid the late-October rush when stores sell out. Starting early also identifies problem windows while you can still address underlying issues like glazing repair. Create a window map of your home, ranking them by priority: north-facing windows first (no solar gain), then east and west, finally south-facing (which provide free heat). Install over a weekend when you have good lighting and patience. The film needs 24-48 hours to fully cure before extreme temperature swings.
Mid-Winter Maintenance Checks
Even perfect installations need monitoring. Check tape edges monthly, pressing down any lifting sections with a cloth-wrapped credit card. Condensation between film and glass indicates a seal breach—find and patch it immediately to prevent mold. If film tears, apply clear packing tape to both sides, then gently reheat to blend. Keep an eye on south-facing windows where sun exposure is highest; UV damage appears as brittleness first. Have repair materials ready before storms hit. A small puncture left unfixed becomes a large rip in high winds. Document any failures with photos to inform next year’s purchasing decisions.
Spring Removal and Storage Best Practices
Wait for a warm day (above 60°F) when adhesive is pliable. Peel slowly at a 180-degree angle, keeping the film close to the frame. Never yank quickly—this risks paint damage. Remove tape residue with adhesive remover and a plastic scraper, never metal. For reusable systems, clean panels with mild soap, dry completely, and store flat between cardboard sheets. Label each panel with its window location using painter’s tape. Coil magnetic tape loosely and store in a sealed bag to prevent dust accumulation. Proper storage extends reusable kit life by years.
Summer Storage to Prevent Degradation
Heat and humidity degrade adhesives and films even in storage. Keep kits in a climate-controlled space, not a hot attic or damp basement. Store film rolls vertically to prevent creasing, and keep them in original tubes. If you must store in garages, use airtight containers with silica gel packets. Check stored materials in late summer—adhesive that’s lost tackiness won’t recover. For magnetic systems, separate magnets from steel components to prevent demagnetization over time. Document which windows you insulated and any issues to streamline next year’s installation.
Aesthetic Considerations: Maintaining Your Home’s Look
Minimizing Visual Impact
Modern films are nearly invisible when installed correctly, but technique matters. Install tape as close to the glass as possible rather than on wide frames—this reduces visible edges. Use a razor blade to trim excess film after shrinking, following frame contours precisely. For dark frames, some manufacturers offer gray or bronze film that blends better than clear. Position lighting to avoid reflections that highlight the film surface. In photos, properly installed film is undetectable; if you can see it, it’s either dirty, sagging, or poorly trimmed.
Working with Historic or Decorative Windows
Stained glass, divided lites, and intricate muntins require special care. Never apply film directly to leaded glass—the heat can crack old solder. Instead, build a secondary frame that holds film away from the historic glass. For divided lites, you have two options: cover each pane individually (time-consuming but invisible) or cover the entire window assembly (faster but you lose the grid pattern). Preservation societies often recommend interior storm windows with magnetic mounting to avoid any contact with original materials. Document everything with photos before installation to satisfy historic district requirements.
Creative Solutions for Rental Properties
Renters face the dual challenge of temporary installation and deposit protection. Magnetic systems shine here—no adhesive touches surfaces. For film kits, apply tape to removable trim pieces you can later discard. Some creative renters build simple pine frames that press-fit into window openings, holding film without any wall contact. These store flat under beds during summer. Always check your lease; some prohibit any window modifications. Offer to leave improvements in place—many landlords appreciate energy upgrades that reduce their heating costs too. Get written permission describing exactly what you’ll install.
Environmental Impact and Sustainability
Material Choices: PVC vs. Eco-Friendly Alternatives
Traditional film kits use polyvinyl chloride (PVC), which raises environmental concerns. Manufacturing releases dioxins, and disposal is problematic—most municipalities don’t recycle it. Newer polyethylene (PE) and ethylene-vinyl acetate (EVA) films offer similar performance with lower toxicity and better recyclability. Look for “PVC-free” labeling. Rigid systems using polycarbonate or acrylic are recyclable and last decades, dramatically reducing waste. The embodied energy of a reusable system is offset after just two seasons compared to annual disposable kits.
The Carbon Footprint of Manufacturing
A single window film kit requires approximately 2.5 kWh to manufacture and transport—the equivalent of running a coffee maker for 2 hours. In contrast, the energy it saves in one season is 50-100x that amount. However, reusable systems have an even better ratio, with manufacturing energy amortized over many years. Consider the source: kits made domestically travel shorter distances, reducing transportation emissions. Some manufacturers use renewable energy in production and offer take-back programs for used film. The greenest kit is the one you install correctly and maximize its lifespan.
Disposal and Recycling Challenges
At season’s end, you’re left with acres of plastic film. PVC film goes to landfills, where it persists for centuries. PE and EVA films can be recycled with plastic bags at grocery store drop-offs, but tape must be removed completely. Rigid panels are recyclable as #7 plastic in some areas. The most sustainable approach is investing in reusable systems that generate no annual waste. If using disposable kits, buy only what you need—overbuying creates unnecessary waste. Consider partnering with neighbors to buy bulk rolls and split them, reducing packaging waste.
Troubleshooting Guide: When Things Go Wrong
Dealing with Peeling Edges
Peeling usually starts at corners where stress concentrates. Clean the area with alcohol and apply a small piece of reinforcement tape over the existing tape, extending 2 inches beyond the peel. Press firmly with a roller. For persistent problems, apply a thin line of removable adhesive caulk under the tape edge. If the frame itself is the issue (powdery paint, loose plaster), remove all tape, stabilize the surface with primer or consolidant, and reapply fresh tape. Never layer new tape over failing old tape—the bond won’t improve.
Fixing Tears and Punctures
Small holes (under 1 inch) are invisible when repaired correctly. Cut a patch from spare film, rounding the corners to prevent peeling. Apply clear packing tape to both sides, overlapping the tear by at least 1 inch on all sides. Shrink the surrounding area gently to blend the patch. For larger tears, it’s often better to remove that section and reapply. Keep the original box with film specs—matching film type matters for invisible repairs. Some kits include specialized repair tape that shrinks with the film, making patches nearly undetectable.
Addressing Condensation Issues
Moisture between film and glass signals a compromised seal but also indicates the film is working—it’s keeping humid indoor air away from cold glass. Find the leak using a moisture meter or incense stick. Patch it immediately. If condensation persists, your indoor humidity is too high. Run exhaust fans in bathrooms and kitchens, use a dehumidifier, or adjust your humidifier settings. Severe condensation can lead to mold on wooden frames—address the moisture source, not just the symptom. In extreme cases, drill two tiny 1/16" holes at the top and bottom of the film to allow ventilation, sacrificing some insulation for moisture control.
What to Do When Film Won’t Shrink Properly
Several culprits cause stubborn wrinkles. First, check your hair dryer’s temperature—older models may not get hot enough. Work closer to the film (3-4 inches) but keep moving. If certain areas refuse to shrink, you may have overstretched that section during installation—gently push it back toward the center to relax tension. Cold ambient temperatures prevent proper shrinking; warm the room first. Some films have a “memory” and shrink only in one direction—if you cut it wrong, it won’t tighten correctly. When all else fails, carefully slice a small relief cut in the sagging area, overlap the edges, and seal with tape before re-shrinking.
Beyond the Kit: Complementary Energy-Saving Measures
Weatherstripping Doors and Windows Together
Window film addresses glass heat loss but not air infiltration around the entire window assembly. Combine kits with compression weatherstripping where sashes meet frames. V-strip (tension seal) works for double-hung windows, while tubular rubber seals gaps in casement windows. Door sweeps and threshold seals prevent the stack effect that pulls cold air in through lower levels while warm air escapes upstairs. Treating windows without addressing door leaks is like bailing water without plugging the hole in the boat. Together, these measures can reduce total air changes per hour from 1.0 to 0.3, a massive efficiency gain.
The Role of Window Film Year-Round
Some insulation kits are removable, but Low-E window film is permanent and provides summer benefits too. These metalized films reflect infrared heat outward in summer, reducing cooling loads by 30-50%. They block 99% of UV rays, preventing furniture fading. The trade-off is reduced visible light (10-30% reduction) and slightly mirrored appearance from outside. For south and west windows that overheat in summer, permanent Low-E film plus removable winter insulation offers the best of both worlds. Calculate your climate’s heating vs. cooling degree days to determine if this hybrid approach makes economic sense.
Strategic Landscaping for Natural Insulation
Nature provides free insulation. Plant evergreen trees on the north side to block winter winds, reducing infiltration by up to 50%. Deciduous trees on the south side provide summer shade but drop leaves to allow winter solar gain. Install trellises with climbing vines on east and west walls—leaf cover in summer creates a vegetative curtain, while bare vines in winter don’t block beneficial light. This passive approach complements active insulation measures. A well-placed windbreak can raise the temperature of a wall by 10°F, reducing the load on your window insulation. Combine living solutions with physical kits for maximum resilience.
Getting Started: Your Action Plan This Year
Assessing Your Home’s Specific Needs
Walk through your home with an infrared thermometer on a cold day. Any window surface below 45°F needs immediate attention. Prioritize rooms you occupy most—living areas and bedrooms over storage spaces. Consider your heating system’s capacity—if it struggles to maintain temperature, insulation provides more comfort than upgrading equipment. Check local utility rebates and weatherization programs; many offer free energy audits that identify your worst windows. Create a simple map marking each window with its size, type, and priority level. This becomes your shopping list and installation schedule.
Prioritizing Which Windows to Treat First
Start with the biggest bang for your buck. North-facing windows gain no solar heat but lose maximum energy—treat these first. Next, address any window with visible gaps or drafts. Then tackle east and west windows, which gain some morning or afternoon sun but lose heat all night. South-facing windows are last; they provide net heat gain in winter. Within each orientation, prioritize larger windows over smaller ones (heat loss scales with area). Don’t forget basement and attic windows—these are often forgotten but represent major air leakage paths. A single 3x4 foot basement window can leak as much air as a 1-inch hole in your wall.
Timeline for Implementation
Mark your calendar: order materials by early September to avoid stock shortages. Schedule installation for a dry weekend with temperatures between 55-75°F. Plan 2-3 hours for your first window, then accelerate as you gain skill. Tackle high-priority windows first, leaving less critical ones for later weekends if needed. Set a completion deadline of mid-October, before first frost. After installation, schedule a follow-up check for two weeks later to catch any early failures. Mark your calendar for removal in late March or early April, before strong sun can bake residue onto frames. This year-long timeline ensures you maximize savings and minimize problems.
Frequently Asked Questions
How much money will I actually save with window insulation kits?
Savings depend on your climate, window type, and energy costs, but typical households save $100-300 per heating season. Single-pane windows in cold climates see the biggest impact—up to 25% reduction in heating bills. Track your usage before and after installation using your utility’s online portal to calculate exact savings.
Can I open my windows after installing insulation film?
No, standard shrink film kits create a sealed barrier that prevents window operation. Magnetic and some rigid systems allow removal and reinstallation, but this is impractical for daily use. Install film only on windows you won’t need to open until spring. For emergency egress requirements, leave one window per room unsealed or use operable interior storm windows.
Will window insulation kits damage my window frames?
Quality kits with clean-release adhesive won’t damage properly prepared surfaces. Problems arise when paint is already failing or surfaces are dirty. Always test tape in an inconspicuous area first. Historic windows with delicate finishes should use magnetic systems that don’t adhere to the frame itself.
How long do window insulation kits typically last?
Single-season film kits last 4-6 months. Premium films may remain intact for a full year but will yellow and become brittle. Reusable magnetic or rigid systems last 5-10 years with proper storage. Climate extremes, pet activity, and direct sunlight all reduce lifespan.
Can I use window insulation kits on sliding glass doors?
Yes, but special considerations apply. Use extra-wide rolls (62"+) and reinforce the bottom edge where foot traffic occurs. Apply a protective strip of clear packing tape along the bottom 12 inches to prevent tears from shoes and vacuum cleaners. Consider magnetic systems for doors you use frequently—they’re more durable for high-traffic areas.
Do window insulation kits prevent condensation?
Paradoxically, proper installation eliminates condensation on the indoor surface by keeping humid air away from cold glass. However, moisture can become trapped between film and glass if seals fail. This is actually a helpful warning sign of air leaks. Address the seal and reduce indoor humidity to resolve it.
Are there fire safety concerns with plastic window film?
Quality kits meet ASTM fire safety standards and are self-extinguishing. They’ll melt but won’t sustain flame. However, they can release toxic fumes when burning, like any plastic. Keep them away from heat sources like radiators and don’t use them on windows near kitchens where cooking fires could occur. They are not suitable for use on windows designated as emergency exits.
How do I handle windows with blinds or curtains?
Install film first, then rehang window treatments. The film needs direct heat application that would damage fabrics. Most blinds fit easily over film, but you may need longer mounting brackets to create clearance. Cellular shades can be mounted directly over film using side tracks that compress the film slightly—this is acceptable and doesn’t significantly reduce performance.
Can I paint over window insulation film to block light?
Never paint directly on film—it won’t adhere and will crack when the film shrinks. Instead, install blackout fabric or paper behind the film before shrinking, or use opaque film designed for privacy. Some kits offer frosted or tinted options that block views while maintaining insulation. For complete darkness, rigid foam boards are a better choice.
What’s the difference between R-value and U-factor for window insulation?
R-value measures resistance to heat flow (higher is better). U-factor is the inverse, measuring heat transfer rate (lower is better). Standard single-pane windows are R-1 (U-1.0). Good window insulation kits add R-1 to R-2, effectively doubling your window’s insulation. When shopping, some manufacturers list R-value, others U-factor—just remember you’re aiming for higher R or lower U.
See Also
- 10 Affordable Window Insulation Kits That Don’t Sacrifice Quality in 2026
- 10 Best Budget Window Insulation Kits Under $25 in 2026
- 10 Best Value Window Insulation Kits for Renters in 2026
- 10 Best Value Window Insulation Kits for Winter Prep in 2026
- 10 Best Value Window Insulation Kits for Winterizing in 2026