Table of Contents
Tackling a kitchen remodel where cabinets hug every wall? Or maybe you’re trimming deck boards in a cramped corner where a full-size circular saw feels like swinging a sledgehammer? You’re not alone. The modern job site—whether it’s a downtown apartment, a vintage home with narrow hallways, or a packed workshop—demands tools that shrink without sacrificing capability. That’s why compact circular saws have evolved from niche gadgets to essential equipment for pros and serious DIYers alike.
As we move through 2026, the technology packed into these smaller packages has reached an inflection point. Brushless motors now deliver corded-like power, batteries last for hundreds of cuts, and ergonomic designs prevent the hand fatigue that used to plague one-handed operation. But not every “compact” label means true tight-space performance. This deep dive separates marketing fluff from the features that actually matter when you’re cutting inches from a wall or overhead in a crawl space.
Top 10 Circular Saws For Tight Spaces

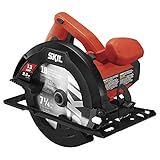


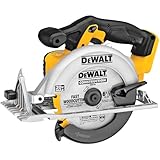

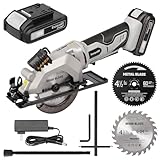

Detailed Product Reviews
Why Compact Circular Saws Dominate Tight-Space Woodworking in 2026
The job site has fundamentally changed. Urban renovations outnumber new construction in most markets, and every inch of workspace comes at a premium. A standard 7-1/4" circular saw needs nearly 10 inches of clearance behind the blade for a full stroke—completely impractical when you’re cutting shelving to fit inside a pre-assembled closet system. Compact models slash that requirement by up to 40%, letting you complete rip cuts that would otherwise require a handsaw or a dangerous plunge-cut maneuver.
Beyond raw size, today’s compact saws integrate smart features previously reserved for track saws and miter saws. Electronic blade brakes stop rotation in under two seconds. LED cut-line indicators project crisp shadow lines that don’t drift in bright sunlight. These aren’t luxury add-ons; they’re safety essentials when your face is inches from the blade guard in a poorly lit utility room.
Understanding Blade Size and Cutting Depth Trade-offs
The 4-1/2" vs. 5-1/2" vs. 6-1/2" Debate
Blade diameter directly dictates your cutting capacity, but the relationship isn’t linear. A 4-1/2" blade typically manages 1-11/16" depth at 90°, perfect for 2x lumber but falling short on 4x4 posts. The 5-1/2" size hits the sweet spot for most trim carpenters, offering roughly 1-3/4" depth while maintaining an ultra-narrow profile. The 6-1/2" blade, the most common “compact” size, delivers a full 2-1/8" cut—enough for 2x material at 45° bevels—but adds bulk that can negate tight-space advantages.
When Smaller Blades Make Professional Sense
Don’t assume bigger is better. A 4-1/2" blade spins faster at the same RPM, delivering cleaner cuts in melamine and reducing tear-out in plywood. The smaller kerf removes less material, meaning your battery lasts 15-20% longer per charge. For flooring contractors cutting engineered hardwood near walls, the reduced overcut at the end of a board minimizes waste and prevents accidental gouging of adjacent surfaces.
Motor Power: Don’t Settle for Weak Performance
Brushed vs. Brushless Motors in Compact Models
Brushed motors still appear in budget-friendly compacts, but they’re a false economy. The friction from brushes converts precious battery power into heat rather than torque. Brushless motors, now standard on pro-grade models, dynamically adjust power draw based on load. Sink the blade into pressure-treated lumber and the motor instantly compensates; make a light pass through MDF and it sips electrons. This efficiency translates to 50% longer runtime and motors that run cool enough to touch after continuous use.
Voltage Platforms and Real-World Cutting Power
The 12V vs. 18V (20V Max) debate rages on, but 2026’s battery chemistry has blurred the lines. Advanced 12V packs using lithium-iron-phosphate (LiFePO4) cells now deliver surge currents that rival first-gen 18V systems. However, for sustained heavy cuts—like ripping 3/4" OSB subfloor—18V platforms maintain higher voltage under load, preventing the bog-down that burns blades and creates dangerous kickback. Some manufacturers now offer “flex volt” batteries that auto-switch between 12V and 18V modes, but the tool’s internal electronics must support this feature to reap benefits.
Ergonomics That Actually Matter in Confined Areas
Grip Design and Hand Positioning
A compact saw lives or dies by its handle. Vertical pistol grips, borrowed from full-size saws, force your wrist into awkward angles when cutting near the floor. Inline grips, resembling a large drill, align the tool’s center of gravity with your forearm, reducing strain during overhead work. Look for rubber overmolding that extends to the underside—metal handles become slippery with dust and condensation in crawl spaces. The trigger lockout should be ambidextrous; you’ll often switch hands when cutting around corners.
Weight Distribution for Overhead Cuts
Specs list bare tool weight, but that number lies. A battery adds 1-2 pounds, and where that weight sits changes everything. Tools with batteries centered under the motor (rather than hanging off the rear) pivot naturally in your hand, letting you steer with subtle wrist movements. Test this in-store: hold the saw horizontally at shoulder height for 30 seconds. If your wrist trembles, imagine that fatigue after 50 collar ties in an attic retrofit.
Corded vs. Cordless: The 2026 Power Source Landscape
Battery Technology Breakthroughs
This year’s game-changer is silicon-anode battery cells, boosting energy density by 30% without increasing pack size. A 2.0Ah battery now stores what 3.0Ah did in 2024, meaning you can carry a lighter saw with the same endurance. But runtime isn’t the full story. Cold-weather performance has improved dramatically; new electrolyte formulations maintain 90% capacity at 20°F, crucial for outdoor work in shoulder seasons. Still, batteries self-discharge faster in extreme cold, so keep spares in a jacket pocket, not the truck bed.
When Cords Still Make Sense
For shop-bound woodworkers or contractors with reliable generator access, corded compact saws offer infinite runtime and zero battery investment. The best models feature 10-foot rubber cords that stay flexible in freezing temps and include cord strain relief that actually prevents internal wire breakage. The trade-off? You’re tethered, and in tight spaces, that cord becomes a tripping hazard and can snag on lumber stacks. Some pros run both: cordless for quick cuts, corded for production ripping.
Safety Features Non-Negotiable for Close-Quarter Cutting
Blade Guards and Retraction Mechanisms
Standard guards hang up on the edge of workpieces, forcing you to manually retract them—a recipe for accidents. Premium compact saws use dual-hinge guards that lift smoothly from either direction, essential for plunge cuts in countertop openings. The guard should retract with less than 2 pounds of force; test this by pushing it back with a scrap piece of wood. If it sticks, walk away. Clear guards are non-negotiable; tinted or opaque plastic blocks your view of the blade’s entry point when cutting at odd angles.
Electric Brakes and Kickback Prevention
An electric brake isn’t just convenient—it’s a safety requirement in tight spots. Without one, a spinning blade coasts for 5-7 seconds after release, catching on gloves or clothing in cramped quarters. The best brakes stop the blade in under 1.5 seconds. Advanced models pair this with electronic kickback detection, sensing blade deceleration and instantly cutting power. This feature has prevented countless wrist injuries when a blade binds in a cut. Note: this tech only works with brushless motors; brushed motors can’t respond quickly enough.
Dust Management in Enclosed Spaces
Integrated Collection Systems
Cutting inside a finished home without dust control is a fast way to lose referrals. Modern compact saws integrate shrouds that capture 70-80% of dust directly at the blade, routing it to a rear port. The port should accept standard 1-1/4" or 1-1/2" vacuum hoses without adapters. Avoid proprietary connectors—they’re the first thing discontinued when models refresh. The best designs position the port to stay clear of your grip, even when the hose drapes over your forearm.
Vacuum Adapter Compatibility
Don’t trust manufacturer claims of “universal” fit. Bring your shop vac hose to the store. The connection should click securely with a quarter-turn; friction-fit adapters vibrate loose after five minutes. For truly tight spots, look for saws with dust ports that swivel 360°, letting you route the hose away from walls and your body. Some contractors attach a short length of flexible hose to the port, then connect their vacuum to that—this isolates vibration and prevents the rigid hose from levering the saw off the cut line.
Bevel Capacity and Adjustment Mechanisms
Positive Stops and Micro-Adjustments
Quick-set stops at 0° and 45° speed up production, but their accuracy varies. Test by locking the bevel and measuring with a digital angle gauge; anything more than 0.5° off requires constant compensation. Micro-adjustment knobs, often overlooked, let you dial in perfect 22.5° angles for octagonal trim or custom crown molding. The adjustment mechanism should be metal; plastic strips under torque and leaves you guessing if the setting held through vibration.
Cutting Angles in Tight Spaces
Beveling a compact saw reduces its clearance advantage. At 45°, the motor housing tilts, often adding 2-3 inches to the tool’s height. Some models shift the motor forward on a pivot, keeping the profile low but increasing the tool’s length. For baseboard scribe cuts in place, look for saws with bevel adjustments that don’t change the distance from blade to motor housing—this maintains consistent sightlines and hand position.
LED Lighting and Laser Guides: Gimmick or Game-Changer?
Shadow Line vs. Laser Accuracy
Laser guides look impressive in the store but drift as soon as the blade tilts. Shadow line systems, using a bright LED to cast the blade’s shadow onto the workpiece, show exactly where the blade will cut regardless of bevel angle. The LED must be positioned at the 10 o’clock position (for right-blade saws) to create a sharp, in-focus shadow. Avoid multiple LEDs; they cast overlapping shadows that confuse the line. The light should activate with a half-pull of the trigger, letting you position the blade before full power engages.
LED Placement and Visibility
In a dark cabinet interior, LED placement matters more than brightness. Side-mounted lights illuminate the cut line but create glare on varnished surfaces. Front-mounted LEDs, integrated into the blade guard, cast even light but can be blocked by your hand. The sweet spot: a low-profile LED at the front of the motor housing, angled 30° downward. This lights the entire cutting zone without harsh shadows. Check if the LED is user-replaceable; some are soldered to the circuit board, turning a $2 part into a $50 repair.
The Shoe Plate: Stability in Awkward Positions
Material and Flatness Considerations
A shoe plate must be dead flat—within 0.005"—or your cuts wander. Aluminum shoes are standard, but cast magnesium saves 30% weight while maintaining rigidity. Avoid stamped steel; it flexes under hand pressure, especially when hot. The best shoes are machined flat after casting and feature replaceable wear strips at the front and rear. These strips, typically UHMW plastic, let the saw glide over rough lumber without marring finished surfaces and cost pennies to replace.
Ripping Fence Quality
The included ripping fence separates pros from DIY kits. A good fence locks securely without tools, rides in a T-slot milled into the shoe, and offers at least 5" of width adjustment. The fence face should be perpendicular to the shoe within 0.5°; test this against a machinist’s square. Some fences include a micro-adjust screw for fine-tuning rip width—a godsend when cutting multiple identical strips for drawer bottoms. Cheap fences flex during the cut, binding the blade and creating burn marks.
Price vs. Performance: Finding Your Sweet Spot
Professional-Grade Investment
Expect to pay $150-$250 for a pro-level compact saw (bare tool). This price includes brushless motors, magnesium shoes, and electronic controls. The cost sting is amortized over thousands of cuts and years of service. Consider the battery platform; buying into a system with 10+ compatible tools spreads the investment. A $200 saw that shares batteries with your drill, impact driver, and reciprocating saw is far cheaper than four separate battery ecosystems.
DIY-Friendly Options
Sub-$100 saws target homeowners with brushed motors and plastic shoes. They’re fine for a single deck project but won’t survive a full renovation. The hidden cost: inferior blades. These saws ship with thin-kerf blades that dull after 50 cuts in construction lumber, forcing an immediate $30 upgrade. A better approach: buy a mid-tier saw ($120-$150) with a brushless motor and upgrade the blade. You’ll get 80% of pro performance at 60% of the cost.
Warranty and Brand Support in 2026
What to Look for in Service Agreements
Three-year warranties are now standard on pro models, but read the fine print. “Limited lifetime” warranties often cover only the tool body, excluding the motor and electronics. Look for “5-year full coverage” that includes the motor controller; this is the most expensive component. Some brands offer “service plans” that cover wear items like brushes (in brushed models) and trigger switches. For battery-powered tools, separate battery warranties matter—2 years is minimum, 3 years is excellent.
Availability of Replacement Parts
A saw is only as good as its parts support. Check the manufacturer’s website for parts diagrams before buying. Brands that sell individual gears and bearings support repair; those offering only “motor assemblies” expect you to trash the tool when it fails. In 2026, 3D-printed replacement knobs and guards are becoming available from third parties, but proprietary electronics remain irreplaceable. Stick with brands that guarantee parts availability for 7 years post-discontinuation.
Pro Tips for Mastering Tight-Space Cuts
Cutting Techniques for Confined Areas
When space prevents a full forward stroke, use a “pull-cut” technique: start the blade, plunge into the waste side, and pull backward. This requires a riving knife that extends both forward and backward of the blade—a feature on better compact saws. For cuts against a wall, remove the blade guard entirely (with the saw unplugged or battery removed) and use a plunge-cut track. This is advanced; practice on scrap until you can control the saw’s tendency to jump on entry.
Jig Compatibility and Customization
Compact saws excel with shop-made jigs. A simple 6" wide plywood base with a fence creates a mini track saw for perfectly straight cuts in cabinet backs. Drill holes in the shoe to accept 1/4" bolts, letting you permanently attach jigs. Some pros attach rare-earth magnets to the shoe for cutting metal studs overhead—the magnets hold the saw against the stud while you focus on pushing. Always test magnetic strength; a falling saw is a nightmare in tight quarters.
Common Mistakes That Ruin Compact Saws
Overheating and Premature Wear
Compact saws have less thermal mass than full-size models. Running them continuously for 20+ minutes without cooldown periods melts motor windings, even in brushless models. The sound tells you everything: a healthy motor hums, an overheating motor screams. In hot attics, rest the saw in the shade, not on sun-baked sheathing. Some pros carry a small freezer pack to set the motor housing on during breaks—it sounds extreme until you’re replacing a $180 tool mid-job.
Blade Selection Errors
Using a full-size blade on a compact saw is dangerous; the larger diameter overpowers the motor and stresses bearings. Conversely, cheap thin-kerf blades flex in deep cuts, causing binding. Invest in quality compact-specific blades with reinforced shoulders. For general use, a 24-tooth carbide blade cuts fast and cleans up with a pass of sandpaper. For finish work, a 40-tooth blade eliminates tear-out on veneer plywood. Never use a blade rated for lower RPM than your saw’s no-load speed; the teeth can literally fly off.
Frequently Asked Questions
What’s the minimum clearance needed behind a compact circular saw?
Most 5-1/2" blade models need just 5-6 inches of clearance behind the blade guard, while 6-1/2" versions require about 7 inches. This assumes a 90° cut; beveling adds 2-3 inches. For true tight spots, a 4-1/2" saw needs only 4 inches, letting you cut within a stud bay.
Can I use my compact saw with a guide rail?
Yes, but only with models that have a compatible shoe. Look for saws with a “track-ready” designation—these have grooves in the shoe that accept guide rail splines. Universal adapters exist but add height, reducing clearance. For best results, buy the saw and rail from the same manufacturer.
How long do batteries last in real cutting?
Expect 150-200 linear feet of 3/4" plywood per 2.0Ah battery charge with a brushless motor. Cutting 2x lumber reduces this by 30% due to higher load. The new silicon-anode batteries extend this by 25-30%. Always carry two batteries: one in the saw, one charging.
Are compact saws less accurate than full-size models?
Not inherently. Accuracy depends on shoe flatness and bearing quality, not size. In fact, compact saws can be more accurate because their lighter weight reduces user fatigue, leading to steadier cuts. The key is a rigid shoe and minimal blade runout—specs rarely listed but evident in cut quality.
What’s the best blade for cutting laminate flooring?
Use a 40-tooth carbide-tipped blade with a thin kerf (1.6mm or less). The high tooth count prevents chipping on the wear layer. Cut with the finished side up and place painter’s tape over the cut line for extra insurance. Some pros dedicate a blade solely to laminate; even minor dulling causes blowout.
Can I plunge cut with a compact circular saw?
Yes, but technique matters. Retract the blade guard manually, place the front of the shoe on the workpiece, start the motor, then slowly pivot the blade into the material. Release the guard as soon as the blade is fully plunged. Practice on scrap—plunge cuts are the #1 cause of kickback in compact saws.
How do I prevent the saw from binding in long rip cuts?
Binding happens when the kerf closes behind the blade, pinching it. Use a riving knife that matches your blade’s kerf width. For critical cuts, drive a shim into the kerf 6 inches behind the blade to keep it open. Cutting with the good side down lets gravity open the kerf naturally.
Is a laser guide worth the extra cost?
In tight spaces, shadow line systems outperform lasers. Lasers drift with blade wear and don’t adjust for bevel angles. A bright LED casting the blade’s shadow shows the true cut line in any orientation. If you must have a laser, choose a model with independent adjustment screws—factory-set lasers are rarely accurate.
What’s the safest way to cut overhead with a compact saw?
First, wear a face shield, not just safety glasses. Use a saw with an electric brake and grip the body, not just the handle, for better control. Cut from the side, not directly overhead, to avoid dust in your face. Most importantly, secure the workpiece so it can’t fall and bind the blade.
How often should I replace the blade?
Replace when you see burn marks on wood or hear the motor straining. For a pro using the saw daily, that’s roughly every 2-3 months. For DIYers, a quality blade lasts years. Don’t wait for teeth to break—dull blades cause kickback. Keep a spare blade in the case; changing a blade in the field with a dull one is frustrating and dangerous.
See Also
- 10 Best Compact Circular Saws for Tight Workspace Cuts in 2026
- 10 Best Compact Circular Saws for Tight Workspace Cutting in 2026
- 10 Affordable Compact Circular Saws That Don’t Sacrifice Quality in 2026
- The 10 Best Compact Circular Saws for Mobile Tradespeople in 2026
- 10 Best Value Compact Circular Saws for Apartment Renovations in 2026